Friday, 15 January 2021

Chinese Style Soupy Rice Bowl

Chinese Style Soupy Rice Bowl 

Bored of making the same Chinese fried rice with Manchurian gravy at home? Well, you just need to be a tad bit creative like me. So this is what I tried instead of that. I cooked up one pot Chinese style soupy style pot rice. It was spicy with Asian flavors, goodness of veggies and added egg for protein. You can add chicken instead or even paneer if you prefer to be vegetarian.

The Sauces mixture is made with just soy sauce, Oyster Sauce, shezwan sauce, lime juice and pepper. You can add the sauces you have in your refrigerator. This makes a  perfect winter dish, it was soupy, saucy, tangy and so much more.


HOW I MAKE CHINESE STYLE SOUPY RICE

To get this simple recipe right you have to remember a few things.

A) SEPARATELY COOK THE RICE- Par cook the rice and then cook together when needed in recipe

B) SEPARATE VEGETABLES FROM LEAFY GREENS- In this recipe you can add any type’s of veggies available in the house. You need to cook veggies like carrots, beans, capsicum/bell peppers, broccoli, cauliflower and corn a little more than cabbage and green leaves. The purpose of this so we can add the stems to cook with the rice, then just wilt the leafy part using residual heat while the rice is resting.


Ingredients

2 tbsp oil

2 garlic cloves, minced

1 piece grated ginger

1 finely chopped onion

1 ½ cup assorted chopped vegetables( carrot, bell peppers, baby corn, zucchini,  broccoli)

1 ½ cup Rice

1 Maggi seasoning powder packet

1 cup chicken/vegetable stock

2 chopped green chillies

2 eggs

Salt and pepper to taste

Spring onion greens for garnish


Sauces
2 tbsp soya sauce

1 tsp oyster sauce

1 tsp Shezwan sauce

1 tsp lime juice 


Method

1. Mix all the sauces together,to make a marinade and keep aside  

2. Wash, clean and cut all the vegetables into small cubes or long pieces. 

3. Beat two eggs, add salt and make an omelet. Once cool cut the omelet into small strips and keep aside.

4. Par cook the rice in water and add maggi seasoning powder to this. 

5.  Now heat 1 tbsp oil in a pot/kadai. Let the oil heat,  add onion, garlic, ginger and cook for two minutes. 

6. Add the vegetables, sauté the vegetables for two minutes on high flame.

7. Add the Chinese sauce marinade  and a cup of stock. Bring to a boil.

8. Now add the par cooked rice and mix well. Cook till the liquid is absorbed and rice is cooked.

9. Add the omelet to this. See that the dish is not too dry. If it is dry add stock to make it soupy.

10. Add the spring onion greens, and salt to taste. Now serve this Chinese style soupy Rice bowl with pride but serve it piping hot. 


NOTES

You can make it an all Veg Pot Rice. Add cubes of Tofu or cottage cheese instead.

Also add other Asian Greens - like pak choy, bok choi etc. Cut per recipe but scatter across top rice when its cooked.


Saturday, 26 December 2020

Easy Recipe of Beetroot Pachadi

 Easy Recipe of Beetroot Pachadi


Beetroot pachadi is a chutney style dish of beetroot which is integral part of Onam Sadhya.


Bring in your Onam festivities with this mildly spiced, curd-based Beetroot Pachadi. This dish is a must on during every offering.  Its deep red color and unique taste  makes it extremely likeable in every morsel. Read the full recipe here:


Beetroot Pachadi


Ingredients:

2 large beetroots

1/2 cup water

½ tsp cumin / jeera

1 whole chilli

½ cup curd

1 tsp salt

½ cup grated coconut

¾ tsp mustard


FOR TEMPERING:

½ tbsp mustard oil

Fresh curry leaves

1 teaspoon mustard seeds

3 dried red chilli

Beetroot Pachadi


Method


1. Grate  both the beetroots and boil it in hot water. In the same utensil, add ½ salt and mix it well. Cover it using a lid and let it boil for 15 minutes till beetroot are cooked. 

2. Now take the 1/2  cup coconut, 3/4  tsp mustard,1/2 tsp cumin, 1 chilli combine all this. Blend it to a smooth paste in a mixer grinder. Keep adding water bit by bit to maintain the consistency of the paste.

3. Mix the paste with the grated beetroot and let them rest for a while.

4. Now cook this over a sim flame for 7-8 minutes to get the taste of raw coconut out. 

5. Let it cool down a bit and add 1/2 cup curd to the mixture and mix it well. 

6. Ensure that the curd doesn’t form lumps and the batter has smooth consistency overall.


FOR TEMPERING 


7. Heat ½ tbsp mustard oil in a pan and splutter 1 tsp mustard seeds, curry leaves and  dried red chillies.

8. Now pour the tempering over pachadi and let it settle at the top.

9. Now serve the beetroot pachadi piping hot with banana chips and steamed rice.


This Recipe was shared by my sister's Mother in law Ms  Arundhaty Vijayan. She makes some really amazing recipes in her earthen pots especially this Beetroot Pachadi and serves it with pride along with prawn curry and rice. 

Wednesday, 23 December 2020

Easy Quinoa Patties/Tikkis

 Easy Quinoa Patties/Tikkis


My experimentation in the kitchen made me cook up this interesting recipe. Want to use up some of that leftover quinoa in the fridge? So I decided in making these crispy quinoa patties. Great for a meal or just a snack these crispy fritters are so much yum!


Quinoa is pronounced as ‘keenwah’ or ‘kinuwa’ is a grain grown for its edible seeds. Quinoa is also known as a super food. It is a good source of protein, its beneficial for vegetarians as well as vegans. It’s also rich in iron, manganese, phosphorus and other minerals.


Ingredients

1 cup Quinoa (soaked overnight)

1 finely chopped onion

1 grated carrot

1 finely chopped capsicum( Green/ yellow/ red)

½ cup boiled sweet corn

5 tablespoons oil

1/2 teaspoon garam masala

1/2 teaspoon turmeric powder

1 teaspoon red chilly powder

1 egg

Salt to taste 


Method


FOR COOKING QUINOA:


Soak the quinoa for 8 to 10 hours. Boil 2 cups of water. Add 1 teaspoon of salt and quinoa. Reduce the heat to low, cover the pan and let it cook for 15 minutes. Once the water dries up, keep aside to use later.


TO MAKE THE PATTIES BATTER


1.   Heat 1 tbsp oil in a pan. Add onions and sauté until translucent. Now add the vegetables and sauté for one minute. Add garam masala,  turmeric powder, paprika, and salt. Let this cook untill all the water from the vegetables evaporates.

2.   Once the mixture is dry, let it cool Add the beaten egg

3.   Now make small palm size balls, roll and flatten to make patties.


4.    Pour the rest of the oil on a grid or frypan.  Fry on medium to medium high heat till the coating is golden brown in color.

5.   Serve this hot with green chutney or ketchup.


Thursday, 3 December 2020

Easy Pea Filled Khasta Samosas Recipe

 Lockdown has made us cook up the most exciting dishes including the street foods we cant go out and savour. I tried out the most amazing khasta coating samosas, but this time instead of adding the regular potato filling, I added a sweet and spicy peas filling. 


Easy Pea Filled Khasta Samosas Recipe


 *For the Samosa Coating*


2 cups Maida
1 tbsp Rawa
Few crushed peppercorns
1/2 tsp Ajwain
Salt to taste
2 tbsp oil
Water for kneading 


*For the peas filling*


1 cups green peas
2 tbsp oil
1/2 tsp red chilly power
1/2 tsp mango powder (amchoor)
Salt and Sugar to taste 


Method


1. Mix all the dry ingredients together. Then add the oil and slowly add water to knead into a stiff dough. Keep aside to use for stuffing.

2. Boil the green peas over medium heat with 1 cup of water, until peas are tender. Drain the water, squeeze the excess water. Take oil in a pan, add peas and mix all the dry ingredients to the peas, chili powder, garam masala, mango powder and salt. Mash till all water is dried up.
 

3. To make Samosas

Now make round small circles with the dough. Cut into half, roll into a cone. Stuff it with pea filling. Seal the end. Make all the remaining samosas like this.

4. Now heat oil in a Kadhai on medium flame and place the samosas in one by one . Fry till golden brown. Serve it Garma Garam with sauce at tea time. 


Also Watch the video to learn the recipe as I Make it.


This post is in association with #HomeChefMatters by FBAI (Food Bloggers India Association) in association with Godrej Cucina 

Thursday, 19 November 2020

Haldi Doodh or Turmeric Milk Latte Recipe

Haldi Doodh or Turmeric Milk Latte Recipe

A drink that calms me down after a hectic schedule is Haldi doodh or Turmeric milk latte (as it's called nowadays). For one it makes me feel warm, fuzzy, and induces deep sleep. 


Haldi Doodh or Turmeric Milk Latte Recipe


Golden milk or Haldi Doodh as they call it, is a traditional Ayurvedic drink made with turmeric root (or ground turmeric), milk, black pepper, and s few other ingredients.  It is totally sweetened with sugar or jaggery but for best medicinal benefits the use of honey is important.  


Here are some of the most basic terms used for Golden Turmeric Milk:


Haldi Doodh: Originated from India, this is the original name for Gold milk.

Turmeric Milk Latte: This is made with warm milk and turmeric. And often preferred to regular  caffeinated lattes.  Some folks also refer to this drink as golden milk latte, golden latte, golden turmeric latte, or turmeric latte.


Haldi Doodh or Turmeric Milk Latte Recipe


Turmeric Milk Benefits

Turmeric milk has numerous benefits for our health. 

It can relieve a sore throat, cold and cough.

 It relaxes our body and soothes aching muscles. 

It is also proven to prevent cancer.

It induces sleep when had at bedtime. 

It gives body warmth and drives away winter chills. 


Now here is an easy recipe to try out. The ingredients will be found easily  in your kitchen. Do try out this recipe. I used Gokul Whole Fat Milk for this recipe


Ingredients

Milk - 2 cups 

1 tsp fresh Turmeric 

5 to 6 Peppercorns

2 cinnamon sticks

1 piece of ginger 

2 tbsp Honey 


Method

1. Put two cups of milk in a pan.

2. Grate some turmeric and add it to the milk. If fresh turmeric is not available you can add turmeric powder (haldi).

3. Now add some ground pepper and cardamom powder to it.

4. Lastly add the honey to the sweetness.

5. Combine all the ingredients on low heat and simmer for 5 minutes .

6. Strain the Turmeric milk and serve it warm.


Friday, 13 November 2020

An Easy Pearl Millets/ Bajra Pulao Recipe


An easy Pearl Millets/ Bajra Pulao Recipe

Nowadays everyone has become health conscious. Eating healthy and exercising has become the need of the hour. As carbohydrates are the key debatable ingredient, we need to take in to consideration other healthier options. Hence there is a revival of the Millet (Bajra) era.


For this recipe I used Pearl Millets (Bajra). Bajra is a gluten-free grain that is rich in antioxidants, soluble fibres and protein. Bajra brings warmth to the body and is excellent to be consumed in winters


For this recipe I used Pearl Millets (Bajra). Bajra is a gluten-free grain that is rich in antioxidants, soluble fibres and protein. Bajra brings warmth to the body and is excellent to be consumed in winters.
 
Today I have tried a different twist to  the regular pulao for good health. This  recipe I substituted regular rice for bajra ... A delicious bajre ka masaledaar pulao...simply spicy and delectable! ...
Lats head straight into the recipe.  


Ingredients

1 cup Bajra (Pearl Millets) , soaked overnight
2 chopped Onions
2 chopped Tomatoes
½ cup Moong Dal
½ tsp ginger garlic paste
1 tsp oil
1/2 tsp chilli powder
1/4 tsp turmeric powder (Haldi)
1 tbsp coriander seeds powder
1/2 tbsp garam masala
1 cup  veggies(carrot, potato, peas)
Salt to taste


Method

1. Pre soak the millets overnight or preferably for 8 -10 hours. This will ensure it cooks faster.
2. Finely chop the onions, tomatoes and other vegetables.
 3. Now take a pressure cooker and heat the oil. Now add the onions and saute till it is translucent.
4. Add the ginger garlic paste and stir for one minute.
5. Now add the tomatoes, chilli powder, turmeric powder, coriander powder, garam masala, salt and sauté for 1-2 minutes on low flame.
6. To this add the soaked and drained bajra, mix well and sauté for 1-2 minutes.
7. Also add the moong dal and add 3 cups of water, close the lid and pressure cook on high heat up to 3 whistles.
8. Then lower the flame and pressure cook for 10-12 minutes.
9. Let the Khichdi wait in the cooker till its warm. At this stage it absorbs water. Open the lid and add a tbsp of ghee and mix well.
10. Garnish with coriander leaves. Serve it hot with curd, pickle and salad. 


Monday, 2 November 2020

Healthy Fruity Muesli Dessert Shots

 Healthy Fruity Muesli Dessert Shots


Nothing beats the fact that you can indulge to satisfy your sweet tooth yet get low on calorie intake. And in this context I end up  enjoying my  experimentation  in the kitchen with healthy wholesome ingredients. When Yogabar sent me their new range of healthy breakfast Muesli and Almond Nut butters this is what I created. You can check out the range on their website here.
This layered healthy Muesli fruity shots is a fun yet low calorie dessert with hung curd. I used the Yogabar fruit, nuts and seeds with whole wheat muesli in the recipe. This Muesli is an indulgent mix of dried fruits, nuts, seeds and whole grains. Added fresh fruit and Yogabar Dark Chocolate Almond Butter .  Added beetroot to hung curd that added a colorful nutritious twist to the entire recipe.  With different layers of yogurt, fruits and muesli, it looked so vibrant and beautiful.


This recipe makes 5 tasty little slimming friendly dessert shots. I used cutting chai glasses here; you can use whatever you have in your kitchen.

So without further ado lets get straight into the recipe.


Ingredients
½ kg curd
½ cup cream cheese (optional)
Juice of half beetroot
2 tsp honey
1 finely chopped apple
1 cup pomegranate pearls
1 cup of YogaBar Muesli
2 tbsp YogaBar Nut butter
4 Digestive Biscuits


Method

1.   Place the curd in a cotton cloth and hang it up over the kitchen sink so that the whey drains out. It will need 2 -3 hours

2.   In a mixing bowl add the hung curd, cream cheese,  beetroot juice and honey and stir well till creamy. Keep aside to use when you start layering.

3.    Break the digestive biscuits into pieces and grind them to a powder, using a mixer. Keep aside.

4.   Take the Cutting chai glasses, make the first layer of powdered digestive biscuits.

5.   Add some chopped apples and pomegranate.

6.   Now add a layer of hung yogurt and cream mixture.

7.   Add a layer of Yogabar Muesli followed by a layer of hung curd.

8.   Add another layer of Muesli and finish the top with dark chocolate Nut butter.

9.   Garnish with pomegranate and some other sprinkles.

10.   Fill up all the 5 glasses in a similar manner.

11.   Serve immediately or after chilling in the refrigerator for a couple of hours. However the chilled version tastes much better.


Notes:

1. You can play around with the recipe to add fruit of your choice

2. No real consistency in quantity, you can make thinner layers of yogurt of fruit.

I hope you will check  this my recipe and try it. And don’t forget to tell me if you liked it!


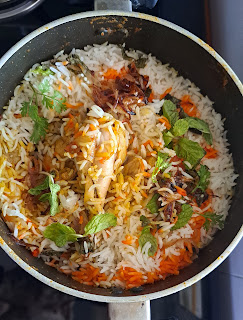
Easy One pot Chicken Biryani

  Easy One pot Chicken Biryani  No fuss steps infact a one pot preparation with a flavourful outcome!  "Fall in love with the irresisti...