Sunday, 21 October 2018

Grilled Pepper/Barbecue Chicken Wings

Hello friends,

This is a recipe given to me by my sister Farzeen. She just enjoys cooking for her family especially non vegetarian dishes. But just like me doesn't tire herself in the kitchen. She experiments with dishes to enhance flavours yet reduce cooking procedures. The end result is always  finger licking good.


So today, I share with you all, her grilled  chicken wings recipe. She makes it in two/three ways. Its an excellent starter and finger food but best of all, protien rich.

Note the ingredients now.


Ingredients

For half kg Chicken wings/ you can add drumsticks if you wish.

For marinade

Salt to taste
1 tsp pepper powder
1/2 tsp Baking powder
1 tsp honey
3 tsp cornflour
2 tbsp olive oil

Other Ingredients

1 tbsp butter
2 tbsp barbecue sauce
1 tsp chopped paisley
1 tsp chopped basil


Wings with basil and parsley 


Method

1. Wash, dry, and season the wings with the salt, pepper, olive oil and honey.

2. Now add the baking powder and cornflour and marinate well.

3. Preheat the oven to 180°C. And transfer the chicken wings on a baking tray or rack for grilling

4. Bake for 20-25 minutes. Turn the chicken wings so both sides turn golden brown.

5. Now in a wok, add butter. You can add olive oil instead. Place the chicken wings.

6. Stir in the basil, parsley and barbecue sauce.

7. Toss for another five minutes and serve it hot with salad/ fries on the side.


Wings tossed in barbecue sauce 


Note

For variation you can add garlic and spring onions to the wok while tossing the grilled chicken wings.


Typically, wings are fried or baked and tossed in sauce just before serving. They turn out tender, juicy with a caramelized, crispy skin that everyone will love.
ENJOY hot chicken wings in the right hand and a cool chilled drink in the left hand. And remember to save some for me. 🤣🤣🤣🤣



Top post on IndiBlogger, the biggest community of Indian Bloggers

Sunday, 14 October 2018

Spicy homemade Paneer 65 recipe

Hello friends, 

Many of my friends have given up non veg food and have turned vegetarian without any regret. Then I wonder are they getting enough protiens from vegetarian sources? 
Cottage cheese/ Paneer is a type of cheese that is high in nutritive value. It is rich in calcium. 


Paneer 65


Today I tried to cook up a southern style Paneer 65 with a zesty chilli / curry leaves flavour. Hope my vegetarian friends will find this recipe interesting. 


Ingredients 

250 gms Paneer
2 Green chillies
1 finely chopped onion
1 tsp ginger garlic paste
2 sprigs Curry leaves
1 tsp red chilli powder
1/2 tsp garam masala
1 tbsp Rice flour
Salt to taste.
2 tbsp curd
1 tbsp fresh cream
1 juice of lemon
Corriander leaves
2 tbsp oil


Method

1. First cut  the paneer into small pieces.

2. Take a mixing bowl, to make the marinade.

3. Add rice flour, curd, cream, ginger garlic, red chili powder,  garam masala, and pinch of salt. Mix well and set aside.

4. Mix it gradually add little water if required to make a thick yet flowing batter. The batter should not have lumps.


5.Mix in the paneer cubes so that all the pieces are coated well with the masala and let it sit in the marinade for minimum half an hour.

5. Now heat 2 tbsp oil in a pan The oil should be medium hot.


6. Add curry leaves and slit green chillies and let it splutter. Now add onions and sauté till pinkish.

7. To this add the paneer pieces. Gently mix and see that paneer doesn't stick to bottom.

8. Now add the lime juice.

9. Cook further till all water evaporates.

10. Garnish with corriander leaves and serve hot like a starter or with roti as a main dish.

Paneer 65


Note

This same dish can be made with gram flour instead of rice flour

You can also deep fry the cubes instead of sauté.

The paneer can even be toasted in the oven for zero oil usage.

You can avoid onions if you wish.


Friday, 5 October 2018

Bheeda per Eendu - Parsi recipe of eggs baked over Okra

Hello friends,

My experience of making bhinda per eedu dates back to my early marriage days when I just knew just a few dishes to cook. And this dish was a life saver.
Okra or lady's finger (Bhindi) have to be first well cooked and before serving the dish,  the okra is topped with a well-beaten layer of eggs and a lavish bhabraving (sprinkle) of pepper and coriander leaves.

Bhindi per eedu


 Bhinda per eedu is the best way to get your family to relish vegetables and enjoy the protein of eggs. We bawas love eggs at any meal.

Note the ingredients and get those eggs cracking.

Ingredients

250 gms Okra ( bhindi)
3 Eggs ( beaten)
1 Tomato (chopped)
1 Onion (chopped)
1/2 tsp ginger garlic paste
1/2 tsp Black Pepper
1 tsp red chilly powder
1/2 tsp garam masala
A dash of lime
Few coriander leaves
Salt (to taste)


Method


1. In a frying pan, add the oil, chopped onion and saute till brown.

2.  Add ginger garlic and saute further till the raw aroma is gone.

3. Add the chopped okra and stir up for two minutes.

4. Now add dry masalas and cook well. Add the chopped tomatoes and continue cooking.

5. Add salt and lime juice at this stage. Cook the orkra till soft and is cooked.

6. Now beat the eggs with salt and pepper.

7. Use the back of your spoon to even out the cooked okra in the oiled pan, so that you have a flat base for the egg layering. Reduce the flame to low.

8. Spread a layer of the seasoned eggs over the okra mixture in the pan.

9. Cover the pan with a lid and let the eggs cook on a low flame for about 10 minutes, till they are done.

10. Garnish with coriander leaves.

11. Serve it hot with roti ketchup and saali on the side.


Note

1. Sometimes you can crack a whole sunny-side-up egg over the bhindi to create a more wholesome meal.

2. Cook the eggs on a low flame so that the okra doesn’t burn at the bottom of the pan. But trust me, sometimes a  crispy layer of orka at the bottom tastes very yummy.

3. You can even bake the egg layering procedure in an oven.


Friday, 28 September 2018

Easy Milk Seviyan Recipe/ Vermicelli kheer

Hello friends

Is there any reason to debate? Sweet Vermicelli  cooked in milk tastes delicious even though it has so many different names. Humko toh khaane se matlab, naam me kya rakha hai. Right? This vermicelli pudding is sometimes referred as seviya kheer or seviya or Sheer kurma too.
Sheer Khurma which literally means “milk with dates” in Persian, is a vermicelli pudding prepared during the holy month of Ramadan or on the last day which is celebrated as Eid by Muslims around the world.


Any which way you call it, the end result  a delicious milky dessert served with love in a bowl. Can be savoured hot or cold. Some methods are a labour of love.


Ingredients

1 cup thin Vermicelli
1 tbsp Ghee
1 litre Milk
8 tbsp Sugar
1 tsp Cardamom Powder (Elaichi Powder)
A few strands of saffron
1/2 tbsp Raisins
1 tbsp chopped Cashew nuts
1 tbsp chopped Almonds


Method

1. Heat 1 tablespoon ghee in a heavy bottomed pan over medium flame. Add the thin vermicelli and roast till the rawness of the vermicelli goes away and it gets coated with ghee.

2. Now in a saucepan, add milk and bring to a boil.

3. Let the milk boil for about ten minutes, until the milk is creamy and reduces.


4. Add the seviya and boil. Stir often to ensure the milk does not burn in the bottom of the pan, and also keep scraping the sides of the frying pan.
Add the milk and increase the heat to

5. Now its time to add the sugar,  saffron, cardamom powder.

6. Keep on low flame and let the seviya kheer simmer over for about 5 more minutes.

7. Now add half of the cashew nuts, almonds and raisins.

8. Turn off the heat but keep stirring so it doesn't burn at the bottom. As the seviyan kheer cools it will become more thicker in texture.

9. Before serving further garnish with nuts and raisins.

 Seviyan can be enjoyed chilled or even warm.


Note - Some quicken the process by adding condensed milk. You can add chopped dates to the boiling milk stage.
If you wish add honey instead of sugar. Jaggery is not recommended as the milk can split. 

Saturday, 22 September 2018

Gujarati Style Muthia Snack Recipe

Hello friends,
Last Sunday when I visited my daughters house, her Mother in law Ms Meena Parikh served up delicious fist shaped snacks called Muthiya with tea. Spicy and tad bit sweet chomping  muthias were a delightful treat. 
This steamed/sauted snack is a much-loved delicacy in every Gujarati household, she proclaimed with pride.


I instantly asked for the recipe. To that, Ms Meena Parikh took me into her kitchen and gave me a lesson into making muthias.


Note down the ingredients. It doesn't look that easy but trust me, once you get it right, you will end up making it many a times.


Ingredients

1 cup wheat flour
1 cup gram flour ( besan )
1 cup grated bottle gourd (doodhi )
½ cup grated cabbage
½ cup grated carrot
1 tsp grated ginger (adrak) paste
1/2 tsp turmeric powder
1 tsp red chilly powder
1 tsp sugar
2 tsp coriander leaves
2 pinches of baking soda
salt to taste
1 tbsp oil
½ cup curd


For Seasoning

3 1/4 tsp oil for frying
1/2 tsp mustard seeds 
1 tsp sesame seeds (til)


For The Garnish

2 tbsp finely chopped coriander leaves

Method


1. Take a big flat dish and mix the flours, salt, sugar, spices, and baking soda together. 

2. Add the grated vegetables to the flour. Combine the mixture, ginger paste, curd, coriander and 1 tsp of oil to it. Mix well and knead into a soft sticky dough. You can add water if needed. 


3. Now make small oblong shaped pieces of it using your fist.


4. Add this to an oiled dish in a steamer or steam them in a cooker  for 20-25 minutes.

5. Leave the dish out to cool. Once it is at room temperature, cut round pieces and keep ready for seasoning. 


6. In a frying pan, add oil. To hot oil, add mustard seeds, white sesame seeds and let it splutter


7.Add the Muthias and sauté on a medium flame for 4 to 5 minutes or till they turn light brown in colour and crisp.


8. Garnish with coriander and serve it hot with adruk masala tea.

Note

Instead of a steamer you can use  an oiled sieve which can be kept on a vessel of boiling water to steam the muthias.
You can poke a knife after the steaming is done to check. If knife comes out clean muthias are well steamed.  


You can now serve this appetizing dish with pride. Need to thank Ms Meena Parikh for this wonderful recipe. Stay tuned for her thepla/ beetroot paratha recipe.


Saturday, 15 September 2018

Perfect French Toast Recipe

Hello friends,

How to make a simple French Toast?


Today lets prepare a very easy peasy recipe with just five ingredients and 15 minutes to get this gastronomical yumminess of a fried egg/bread/milk combo on your plate. Yes, the French Toast is an old dish that is being prepared in many Indian households for breakfast. Its usual for Sunday Breakfast in the Irani household too.

French toast


Moti Irani


My  sweet momma  Moti Irani  used to make French toast once in a way after much pestering from my sister Farzeen and me. No one could stop at one toast. That deep fried bread sugared and browned in ghee was something irresistible.


Lets prepare the french toast now. Its a special request recipe from a dear friend Krishna Maharana who follows all my recipes. Thanks dear, this one is for you.


Ingredients 

 2 eggs
1 cup milk
 6 tbsp sugar
1/2 rsp vanilla essence
6-8  sandwich bread
Half cup oil/ghee for frying
1/2 tsp cinnamon powder (optional)

Servicing suggestions 


Honey/Maple syrup/whipped cream/chopped bananas.


Method 


1. Break two eggs and whisk

2. Powder the sugar, or you can warm the milk and dissolve sugar in milk.


3. Now add the sugar  milk, vanilla extract and whisk well well with a fork.

4. Dip bread into bowl with egg mixture. Make sure both sides are wet.

 5. Preheat a the oil/ ghee in pan over  medium heat. I use half oil/ghee. Let it be hot before you place the slices of bread.

6. Place the slice of bread in pan.  Continue placing all dipped slices rill pan surface is full.


7. Turn slices over when bread slightly brown. Reduce flame and try not to burn the bread. ( This could be tricky for first timers)

8. Remove cooked slices to a paper napkin to soak up extra oil.

9. Sprinkle with honey and serve warm on the breakfast table.


Try it once and you will get requests to make it very regularly, trust me.
Stale bread makes even tastier French toast.

Bon Appitet. 

Monday, 10 September 2018

Healthy Breakfast Granola

Hello friends,

I'm going to be very honest with you today. This recipe is not solely mine. It was inspired  by a dear friend Sabina Ahmed who brought a batch of her homemade muesli/granola chunks to a luncheon date for all of us to try.

The main similarity between muesli and granola is both are made up of grains, nuts, seeds, and dried fruits. The difference is  muesli is unbaked while granola is combined and baked along with a sweetener and oil to bind the ingredients together.


Granola


I tried to do a granola mixture of a few healthy nuts,  seeds and oats adding Olive oil (healthy fat) and organic honey as a sweetener. Its not baked but a quick fix in a pan over the flame. But turned out deliciously nutty just like me. LOL!!


Ingredients

100 gms almonds
100  gms walnut
100 gms sunflower seeds
100 gms pumpkin seeds
50 gms peanuts
50 gms blacksesame seeds (til)
2 cups pressed Oats
50 gms black raisins.
100 gms white raisins
2 tbsp Honey
1 tbsp Cooking Olive oil

Homemade Granola

Method

1.Measure all the Ingredients from the above list and keep ready to mix.
2. Roughly chop the almonds into 2/3 pieces and walnuts into half.
3. Mix all the dry fruits, seeds and nuts with hand. The oats don't have to be mixed here.
4. Take a deep bottom dish, roast the mixture. keep  aside.
5. In the same pan add the olive oil and honey, now mix in the granola  mixture and oats. See that the honey gets coated and mixes well.
6. We do not want to cook this on high flame or for a long time. So keep flame on low for 2 minutes maximum time.
Granola

My Granola Breakfast bowl


Ingredients

1 banana
1 cup plain yogurt
1 cup of my  Granola mix
1/2 tsp cinnamon powder

Method

 In a bowl, add the yogurt to the bottom, sprinkle the cinnamon powder. Now add the granola and layer it with chopped banana. You can have this chilled. It tastes so yummy and keeps your tummy full for over two hours. Trust me.


Options

1. You can substitute dates with honey. Add dates to oil and let it gets cooked before adding granola mix.
2. I missed to add flax seeds. So next time I add that too.
3. Cashew or Pistachio is another option. Kids will love it.
4. Store in an air-tight container or refrigerate for a longer shelf life.


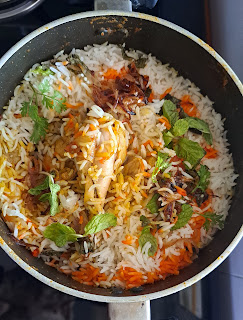
Easy One pot Chicken Biryani

  Easy One pot Chicken Biryani  No fuss steps infact a one pot preparation with a flavourful outcome!  "Fall in love with the irresisti...