Showing posts with label egg dish. Show all posts

Monday, 6 April 2020

E- Spicy Egg Curry Recipe #BlogchatterA2Z


 Hello Friends, 

For the letter E, I am doing a simple and spicy boiled egg curry that can be made in less than 30 minutes. This egg curry is a delicious spicy preparation of the eggs in an onion and tomato-based gravy.
spicy boiled egg curry


Ingredients


3 - 4 Eggs
2 Onions  
6 Tomatoes
1 tsp Turmeric powder (Haldi)
1/2  tsp Garam masala powder
1 tsp Coriander Powder (Dhania)
1 tsp Red Chilli powder
1/2 teaspoon Sugar
1 tsp ginger garlic paste

Coriander Leaves
2 tbsp cooking oil 


How to make Quick And Simple Egg Curry Recipe 


Method

1. Start by boiling the eggs for 12-15 minutes. Cover the pan with a lid the eggs will cook faster. 
2.  While the eggs are boiling, start with the egg gravy. Heat 2 tablespoons of oil in a Kadai; add the roughly chopped onions,  garlic and ginger paste. Sauté for a few minutes until the raw smell goes away and the onion changes its color to pink.  
3.  Once the onions are well fried, add in the turmeric powder, sugar, garam masala powder, coriander powder, and red chili powder. Stir all these masalas into the onion masala until well combined. Keep stirring for 2-3 minutes.

4.  Add in the finely chopped tomatoes and stir in for 2 to 3 minutes.

5. Now switch off the gas and transfer the mixture into a mixer and grind it to a pulp.

6. Now transfer it back to the Kadai and add half a glass of water.

7. While the curry is boiling, crack the eggs and take off the shells. 

8. Add the eggs to the curry and let it simmer.

9. Let the curry coat the eggs. Garnish it with coriander leaves. 

10. Your quick and delicious egg curry is ready. Makes a perfect afternoon meal when served with steamed rice, salad, and boondi raita. 

Note-


You can add tomato Puree instead of whole tomatoes to quicken the procedure.


spicy boiled egg curry


Wednesday, 1 January 2020

Parsi Recipe - Methi par Eedu, Eggs with Fenugreek


Hello.

Wishing all my readers and recipe lovers a very happy and prosperous 2020. May it be a healthy one filled with good wholesome food. Cooking with love for your family be your priority and may you cherish each meal moment with them.

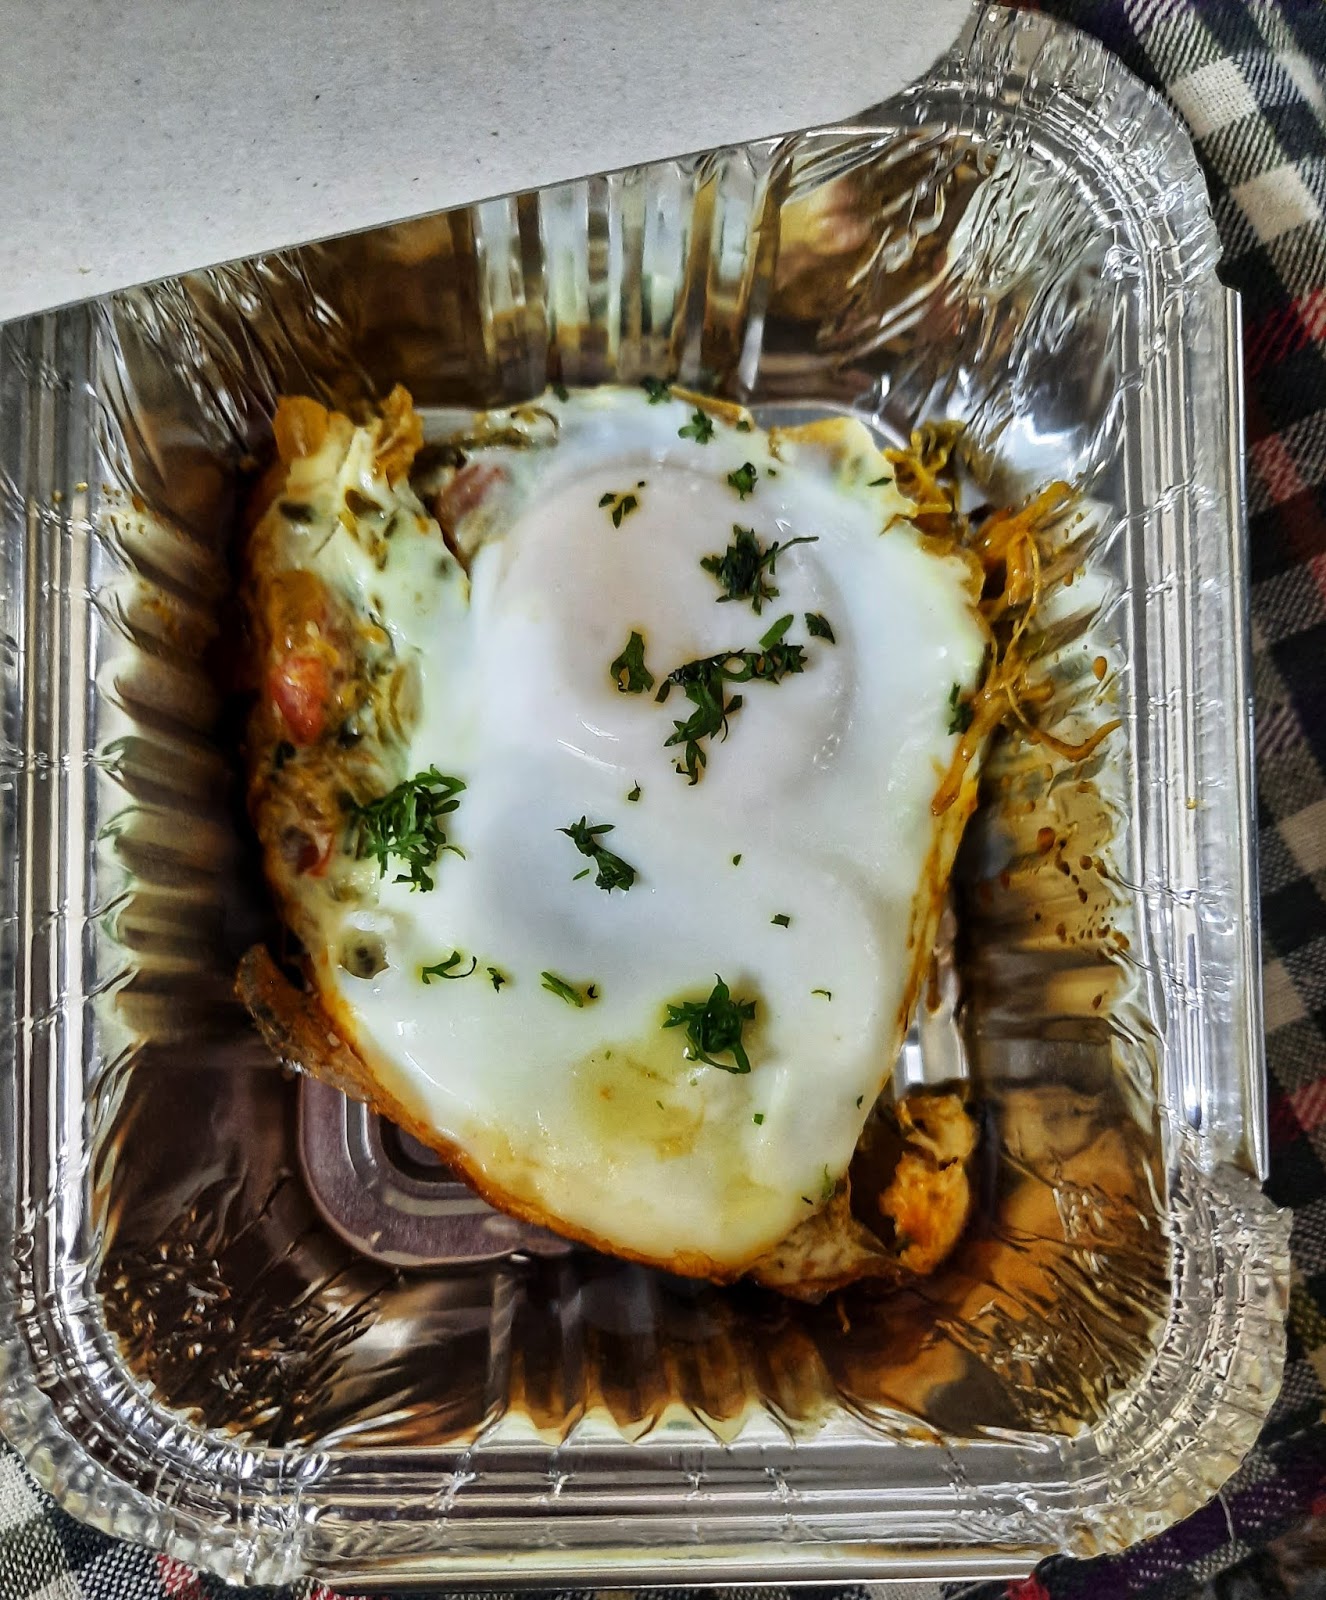
Methi par eedu


Today was the first day of 2020. And I wished to pack my husband tiffin with something easy and freshly cooked. This recipe of Bhajji per eedu took 20 minutes to prepare. I got it done while he was reading his morning paper over a cup of tea.

Methi par eedu


Actually, the combination of vegetables with protein is the best option in a Parsi household. I used small methi (fenugreek). It is slightly bitter but very nutritious.

For Methi Par Eeda Recipe with two eggs

Ingredients 


2 cups fenugreek (washed and cut)
2 eggs
1 bunch spring onions
1 tbsp oil
2 tomatoes
1 chopped green chilly
1/2 tsp ginger - garlic paste
1 tsp red chili powder
1/2  tsp cumin powder
1 tsp coriander powder
1/2 tsp turmeric powder
1 tsp white vinegar
A small piece of jaggery
1 tsp chopped coriander leaves
Salt to taste


Method


1 Wash and finely chop the methi leaves. Chop spring onions and tomatoes too.

2. Heat oil in a deep non-stick pan. Add onion bulbs and sauté till pinkish in color.  Add chopped chilies and ginger garlic paste. Stir for another  30 seconds.

3. Now add the methi leaves and spring onion greens and stir on low flame for 2 to 3 minutes

4. Now add the chopped tomato, salt, chili powder, cumin powder, and coriander powder, mix and cook for 1-2 minutes.

5  The fenugreek and tomatoes will leave the water and cook in itself. Cover and cook, it will take lesser time.

6  Gradually add the vinegar and jaggery and mix it well. Cover and cook on low heat till water dries.


7. Now transfer the mixture into a flat non-stick pan and it spread evenly. Place the pan on heat.

8. Break the eggs, one by one. See that the yolks don't split. Keep some distance between the two eggs

9. Place a lid on the pan. And add a little water on top of the lid.  Cover and cook 3-4 minutes.

10. Open the lid, sprinkle salt and chopped coriander leaves.

11. Cut a slice with the egg. Serve with hot chappatis and ketchup.


Note


If you feel the methi is burning at the bottom, add a little water before topping it with eggs

You can beat the eggs and add the layer of beaten eggs as an option. This gives a more even finish.

Add a tablespoon of ketchup while cooking the fenugreek leaves if you enjoy a sweet taste to your dish.

You can also check wafer par eedu recipe here

Thursday, 7 March 2019

Boiled Egg Parathas/ Anda Paratha Recipe

Wish you all a Very Happy Women's day


And happy moments cooking for your family. There is absolutely no limit of stuffing you can put in a paratha. You can stuff the parathas with almost anything, but have you ever tried boiled eggs stuffed parathas before?


It was a big surprise for me too when I visited my sister's house. This is what I learnt from her maid. Came back home and tried to replicate it for my egg loving family.
 It can make a very nutritious morning breakfast or even can be packed with tiffin. These egg parathas taste best when had hot and with some lime/chilly pickle.

To make four parathas, note the ingredients and recipe.


Ingredients

3 cups wheat flour
2 boiled eggs
Water for kneading dough
1/2 tsp garam masala
1 tsp chaat masala
1 chopped chilly
Half cup chopped corriander leaves
Salt to taste
Cooking Oil (or Ghee)


Method

1. Take the flour in a bowl , add little salt and  knead into a soft dough.

2. Sprinkle  a little oil over it,  cover and let the dough rest for 15 minutes.

3. After 15 minutes take out the dough and knead it once again. Now divide the dough in four parts.


4. Peel the boiled eggs and grate them like you would grate a cube of cheese. Even the yolks.

5. Now mix in the corriander leaves, chopped chillies, garam masala, chaat masala and salt.

6. Make 4 equal potions of the egg mixture.

7. Use your fingers to make the dough ball flat in your palms like a round disc.

8. Place the egg mixture in the middle and seal the sides. Bring the dough around and seal it.

9. Dip this in the dry flour and roll it to a disc.

10. With the help of rolling pin, roll out a flat  round paratha.


11. Now heat a tawa or pan, cook the egg paratha from both sides using little oil/ghee.

12. Cook it on slow flame, serve it hot and  enjoy with pickle or ketchup.


Friday, 5 October 2018

Bheeda per Eendu - Parsi recipe of eggs baked over Okra

Hello friends,

My experience of making bhinda per eedu dates back to my early marriage days when I just knew just a few dishes to cook. And this dish was a life saver.
Okra or lady's finger (Bhindi) have to be first well cooked and before serving the dish,  the okra is topped with a well-beaten layer of eggs and a lavish bhabraving (sprinkle) of pepper and coriander leaves.

Bhindi per eedu


 Bhinda per eedu is the best way to get your family to relish vegetables and enjoy the protein of eggs. We bawas love eggs at any meal.

Note the ingredients and get those eggs cracking.

Ingredients

250 gms Okra ( bhindi)
3 Eggs ( beaten)
1 Tomato (chopped)
1 Onion (chopped)
1/2 tsp ginger garlic paste
1/2 tsp Black Pepper
1 tsp red chilly powder
1/2 tsp garam masala
A dash of lime
Few coriander leaves
Salt (to taste)


Method


1. In a frying pan, add the oil, chopped onion and saute till brown.

2.  Add ginger garlic and saute further till the raw aroma is gone.

3. Add the chopped okra and stir up for two minutes.

4. Now add dry masalas and cook well. Add the chopped tomatoes and continue cooking.

5. Add salt and lime juice at this stage. Cook the orkra till soft and is cooked.

6. Now beat the eggs with salt and pepper.

7. Use the back of your spoon to even out the cooked okra in the oiled pan, so that you have a flat base for the egg layering. Reduce the flame to low.

8. Spread a layer of the seasoned eggs over the okra mixture in the pan.

9. Cover the pan with a lid and let the eggs cook on a low flame for about 10 minutes, till they are done.

10. Garnish with coriander leaves.

11. Serve it hot with roti ketchup and saali on the side.


Note

1. Sometimes you can crack a whole sunny-side-up egg over the bhindi to create a more wholesome meal.

2. Cook the eggs on a low flame so that the okra doesn’t burn at the bottom of the pan. But trust me, sometimes a  crispy layer of orka at the bottom tastes very yummy.

3. You can even bake the egg layering procedure in an oven.


Saturday, 23 June 2018

Lovely Omelette Recipe

Hello friends,
                         No trip to Mussoorie is complete without a visit to the little LOVELY Omelette Store, right in the middle of Mall road. This place is owned by Mr. Khurshid Muhammad,he has been serving unique preparations of omelette that various travel magazines acknowledge as the best.
Its truly a Surprise and Delight for Egg-enthhusiasts!


Just got nostalgic about over our recent trip, also craving to eat that delicious Lovely Omelette. I checked out the exact recipe and even tried to replicate it at home. No fancy ingredients in this recipe. The special ones are with cheese, chilies, onions and spices, served with a a slice of bread inside it.  And the most intriguing part is that, if I didn't tell you, your taste buds would never actually know that there was bread in it.


In the video you can check the owner making this delicious Lovely Omelette. 


Ingredients for two omelettes

Ingredients

2 eggs
1 slice of cheese
1 slice of bread
1 tsp chopped coriander leaves 
1 green chilly
salt/pepper
oil to fry
 ( I did not use onion in this version I made, however you can use finely chopped onion to enhance the taste)


Method
( for one basic cheese lovely omelette)

1. Prep is very important before the omelette hits the pan. Take a bowl, break  two eggs it

2. Whisk with a fork, add salt, pepper, half a chopped onion and chilly.


3. Now comes the tricky part. Take a pan and add oil to it, put it on low flame.

4. Once the oil is hot, add the egg mixture and spread it to the rim.


5. Now place the slice of cheese in the middle and the bread slice on the cheese.

6. Fold the parts of omelette over the bread to cover it.

7. Flip it and cook on the other side, press to see if egg is cooked through.

8. Transfer in the plate, cut into squares and serve.


I did well for the first attempt to replicate this Lovely Omelette. It turned out soft, full of cheese, gooey on the inside..melted in your mouth. What else can you ask for???


Top post on IndiBlogger, the biggest community of Indian Bloggers

Easy One pot Chicken Biryani

  Easy One pot Chicken Biryani  No fuss steps infact a one pot preparation with a flavourful outcome!  "Fall in love with the irresisti...