Showing posts with label recipe. Show all posts

Friday, 29 June 2018

Quick and easy low cal dessert with hung curd

Hello friends,

Its so difficult to stay of sugar, every time the craving comes back with an excuse to eat something sweet. But I have consciously made an attempt to avoid the white refined sugary products and opt for sweet healthy alternatives.  

The next best alternative is honey however I prefer to sweeten my desserts with natural fruits like mango, papaya, grapes that have equal amount of natural sugars.Raisin and dates are another good option. 


Today I have stirred up an oats granola mix with curd, apple and mango dessert. I also used some left over walnut cake I recently brought back from Pune. You can use some digestive biscuits or give it a miss if you wish.


Ingredients
( To make three potions of this dessert)

1 cup hung curd
1/2 cup roasted pressed oats ( I used a oats breakfast mix)
1 cup chopped mango
1 chopped apple
Left over cake


Method 

 1. To make hung curd - You need to put regular curd in a muslin cloth and let it hand till the water of the curd oozes out. The curd will thicken and become half the size.

2. In a blender, whisk the hung curd and mango pieces to make a paste. Do not add any water. This will be mildly sweet, if you want it sweeter you can add a tablespoon of honey.

3. Wash the apple thoroughly and chop it into extremely  small pieces.


4. Take dessert glasses of your choice, you can even take shot glasses or regular glasses. Add the cake crumbs to the bottom and press it with the back of spoon.

5. Add a layer of curd mix, lightly bang glass for layer to even out.

6. Now add a layer of oats and apple pieces. 

7. Repeat the layer of cake, oats and curd. Lastly again top with chopped apple and garnish with walnut.

8. Chill before serving and enjoy this yummy dessert


Note for variation

1. Add some chocolate to the curd, kids will love it.

2. Optional fruits to try with -
papaya and musk melon have good quantity of sweetness.

3. You can use a wine glass for setting the dessert.

3. If you don't have cake then use digestive biscuits.

4. The oats can be mixed with almonds and walnuts to make a crunchy layer.

5. No curd, use custard.

The options are endless. Its all about enjoying what you make and serving it with pride.

So enjoy cooking and Cooking with Sweetannu. 
If you have any suggestions or variations then so write in the comments below.

Top post on IndiBlogger, the biggest community of Indian Bloggers

Sunday, 20 May 2018

Smoothies - Two easy Low cal desserts with banana

Hello friends,

Aaj Sunday hai!!
Toh kuch meetha khane ka din hai!
The craving to indulge into something sweet has made me try out two desserts. They both are low cal, healthy and fruity.


Smoothies are very refreshing this weather. First I tried a Mango Banana Smoothie made with fresh mangobanana, honey and milk. You can use yogurt instead of milk.
You can add more milk, but I like it like a thick shake and very fruity.
The second dessert is a protein chia seed shot made with chia seeds, dates, milk, almond powder and banana.


Banana Mango Smoothie 
Ingredients
I cup Mango Puree
1 Banana
I cup milk/ plain yogurt
Sugar/honey optional

Mango banana smoothie

 Method
1. Take two mangoes, wash peel and remove the pulp. You can blend it in a mixer or do it with your hands.
2. Chop up the banana, now combine the milk, mango pulp and banana.
3. Put this all in a mixer and blend well4. Pour this in glass and top it with pumpkin seeds and some pistachio powder.
5. Keep it in the chiller for some time before serving.

6.You can use yogurt instead of milk.
7. If mangoes are not sweet sugar can be added but I avoid it. Enjoy the natural sweetness and goodness of the fruits.


Chia Banana Date Pudding

Ingredients

¼ tsp vanilla extract
¼ tsp cinnamon powder
1 cup whole milk
½ cup finely chopped dates
2 tbsp Almond powder
2 tbsp chia seeds
 

Method

1. Soak two big tbsp of chia seeds in half cup water. For best results leave this overnight.
2. Take milk and mix the almond powder in it.
3. Add chopped dates, cinnamon powder and dates.
4.Blend this in a mixer for 1 minute only.
4. Now stir in the chia seeds. Pour this in small dessert glasses.
5. Top it with sliced bananas and cinnamon powder. 


Enjoy this chilled and see how your stomach will say a big thank-you to you.
Top post on IndiBlogger, the biggest community of Indian Bloggers

Saturday, 21 April 2018

Veggie Hakka Noodles

Top post on IndiBlogger, the biggest community of Indian Bloggers


Recently I was present at the launch of  #WaiwaiCity outlets in Mumbai city. These noodle bars will create a lively and inviting environment, with some really interesting items on menu.  It sure will transform the food scenario with its delicious flavours and pocket friendly prices. 


Noodles


Even their packeted products have yummy flavours and can be stirred up instantly. I had a few veggies and along with the  @Waiwai  hakka flavoured instant noodle my dish was ready in no time. 


Wai Wai Noodles


Other ingredients 


Ingredients.


1 packet of Hakka noodles
1 tsp pepper powder
2 slit green chillies
2 tbsp Olive oil
4-5 Garlic pods
1 small piece of ginger
2 cups mixed vegetables
1 tsp green chilli sauce ( optional )
1 tsp soy sauce
1 tsp vinegar


Method


1. First take the noodles, crumble them into a pot of water and cook  as per the package instruction. Boil the noodles with a pinch of salt and 1 tsp Olive oil. Cook till 3-4 minutes. 


2. Pour cold water on the cooked noodles after draining out the hot water. Then sprinkle some oil and mix it well to avoid sticking.

3. Take a heavy bottom work or pan, heat oil, add chopped ginger and garlic and saute it well till it turns slight brown. Then keep the flame on high and add onion or spring onion white. Add slit green chillies. 


4. Add the other vegetables, ie carrot, broccoli, beans, capsicum, cabbage and stir it well. I added zucchini too to this one. 
Let it cook for 2 minutes constantly stirring. 


5. Now add pepper powder, salt, green chili sauce, soy sauce, and stir it well. Now add vinegar and stir it again.

6. Finally, add the cooled noodles and mix well. See that noodles don't stick or burn at bottom. At the end, add  the spring onion greens. 


Note


  1. Everything needs to cook on high flame This is the key to the successful noodle recipe 
  2. Do not cover and cook. 
  3. Feel free to add mushrooms or any other vegetables. 
  4. Variation - Chicken, prawn and egg can be added to make a non veg variety. This has to be added with the vegetables in the fourth stage. 

With Chopsticks fork or hand.... Just enjoy it garma garam 


Wednesday, 18 April 2018

METHI PARATHAS

Hello friends..


 I have started this blog recently and am happy with the response on the simple recipes that I am posting. Previously I have shared an easy paratha recipe with you guys and also Methi malai Matar but the methi ka paratha is still my all time favourite paratha recipe. Methi or fenugreek as we call it in English may be bitter in taste but has so many good properties.

Benefits of Fenugreek

  • Fenugreek leaves have great capacity of lowering the bad  cholesterol levels in the body.
  •  It also helps in controlling the levels of glucose in the body hence aiding diabetics problems
  •  Reduces Inflammation inside the body.
  • Promotes milk flow in Breastfeeding. Hence the methi ka ladoo that is given to all women who breastfead after delivery.
  • It can combat acid reflux and deals with heartburn.
  • It stabilizes and maintains good body temperature. 


Recipe of Methi Paratha


Ingredients
  • 2 cups wheat flour / atta
  • 1 cup methi leaves / fenugreek leaves finely chopped
  • ¼ cup curd
  • ½ tsp turmeric / haldi
  • 1 tsp ginger garlic paste
  • ½ tsp red chili powder
  • ¼ tsp cumin powder
  • salt to taste
  • ½ tsp carom seeds / ajwain
  • 2 tsp oil
  • water as required to knead dough
  • Ghee to roast

Method 
  1. Take a large  mixing bowl, add the  wheat flour and chopped methi leaves.
  2. Now add ¼ cup of curd and mix it in.
  3. Add all the spices and salt to the mixture.
  4. All oil and enough water to knead the dough
  5. Knead the dough into a tight ball.
  6. Now keep this aside covered  with moist cloth to rest for 20 minutes.
  7. Now make round balls of the dough, just like for roti (palm size)


  8. Roll out like a chappati with a rolling pin.


  9. On a  hot tawa, put the paratha and cook for a minute.
  10. Flip  the methi paratha on the other side and sprinkle some ghee while it is cooking.
  11. The paratha is ready now, enjoy methi paratha now with raita and pickle.

Monday, 16 April 2018

Chicken Veggie Salad

Hello friends,
This chicken salad is an easy and delicious recipe. Its light on the tummy also being perfect for Indian Summers.This visual treat with a riot of colourful vegetables will make you want to dive into the bowl of salad. 

Chicken Vegetable salad


The dressing can be altered and customised according  to your taste.  I have done a simple Asian style dressing keeping in mind not to keep it bland catering to our love of spice. 


INGREDIENTS

  • FOR THE SALAD
  • 200 gms shredded boneless chicken 
  • 1 1/2 cups purple cabbage
  • 2 small carrots
  • 1 large Zucchini 
  • 1 large Iceberg 
  • 2 red/yellow bellpeppers
  • 1 small broccoli 
  • Handful of grapes
  • Olive oil
  • Salt
  • FOR THE DRESSING
  • 1 tsp olive oil 
  • 2 tsp Honey 
  • 2 tsp soy sauce
  • 1 tsp  chilli flakes 
  • 1 tbsp chilli  sauce 
  • 1 teaspoon pepper powder 
  • 1 juice of lime 

METHOD 


1. Chop up the vegetables in medium size pieces. Boil the chicken, shred and keep aside. 

2. Except iceberg lettuce and grapes add all the veggies in a bowl and add oil to it. 


3. Mix well, now transfer the veggies in a tray and grill in pre heated oven for 2 minutes. Or you can toss it in a pan on low flame for two minutes. 

4. Now in a big mixing bowl add the veggies, let it cool. Add chopped ice Berg, grapes, and shredded chicken. 

5. Now make the dressing for marinade. Whisk the marinate well to combine the ingredients. 


5. With a wooden ladle mix the dressing to the salad. Enjoy it at room temperature or chilled. 

Note


In vegetarian options you can add paneer, tofu or feta to the salad instead of the chicken. 

You can add onions and tomatoes to the salad too. But onions start to smell while tomatoes tend to turn soggy. 

Enjoy the salad with some roast chicken. Recipe next on blog. 

Stay tuned and keep cooking with Sweetannu.  


Tuesday, 10 April 2018

Quick Aloo Capsicum

Hi friends,
So after that chicken recipe yesterday let's get back to an easy vegetarian dish.Today I was feeling too lazy to go to the market.

Doorbell
Enters Sujata
She - Bhabhi, aap bazaar nahi gaaye ?
Me - Nahi, kal jaoongi.
She - Phir aaj kya pakana hai?
Me - Aloo aur capsicum hai, uski  sabzi  banate hai.


After all cooking up a good dish is not about many ingredients, we can make a lip smacking dish if cooked the right way.  Check the easy recipe below.


Ingredients

250 grams capsicum
2-3 potatoes
1 tsp cumin seeds
1 tsp red chilli powder
1 tsp dhania - jeera powder
1/2 tsp turmeric powder
1 tbsp white or black vinegar
A pinch of sugar
2 tsp cooking oil
Chopped coriander leaves
Salt to taste


Method

1. Wash and chop the capsicum and potatoes in half inch cubes.
2. Take a wok and put 2 tbsp oil in it. In hot oil add the jeera and let it give out an aroma.
3. Quickly saute the potato cubes in the wok. Don't allow the potatoes to stick to the bottom.


4. Add the chopped capsicum, dry spices and salt.
5. Cover the vessel and cook for 5-7 minutes. Open to check if done.
6. Now add the vinegar and sugar and stir in. Shut the gas and let it cool with lid on.
7. Once slightly cool add the chopped coriander as garnish.
8. Serve hot with roti. It can be enjoyed with plain dal - chawal and some mango pickle.


Cooking Suggestion

If the taste of vinegar is not liked, then substitute it for lime.
Also see that the capsicum is not over cooked. Make potato cubes smaller than the capsicum so they cook faster.

Sunday, 8 April 2018

Red Chicken Curry

Yummy Yummy for your tummy.


Once a week, I cook up a chicken curry in red, white or green gravy. However I thoroughly enjoy cooking up red masala chicken curry as it reminds me off the delicious chicken curry my grandmother used to make in the earlier days. Thick with cashew nuts and coconut milk and reddened it with kashmiri chillies.
I try to replicate it but its far from even being close to the authentic taste. However my family loves it, so here goes the recipe. Do not get intimidated by the list of ingredients, they can be easily found in every kitchen. 


Ingredients

  • For the  curry paste

  • 2 tpsp fresh grated coconut
  • Handful of cashew nuts 
  • 1 tsp sesame seeds (til)
  • 1 tsp cumin seeds (jeera)
  • 1 tbsp coriander seeds (whole dhania)
  • 6 dry Kashmiri chillis
  • 5 peppercorns
  • 1/2 inch stick cinnamon
  • 3 clove
  • 2 cardamom 
  • 5 garlic post
  • 1 big onion 
  • Oil
  • Other Ingredients

  • 1 kg chicken with bone 
  • 2 tsp ginger-garlic paste
  • 2 tsp red chilli powder
  • 1/2 tsp turmeric powder
  • 1 Tbsp curry masala powder
  • 3 big tomatoes 
  • Salt
  • 2 tbsp cooking oil
  • 4 bay leaves


Method

For the curry paste 

1. Take oil in non stick pan, add roughly chopped onions and garlic, grated coconut,  dry roast on high flame till Brown.Take out and keep aside. 
2. Roast all the rest of the dry spices, chilies, and cashew nuts. 
3. Now by adding a little water combine all the ingredients, grind in a mixer till you get a smooth thick paste. 

For the curry 

1. Wash the chicken pieces and apply some salt and turmeric powder to it.

2. Heat oil in saucepan. Add bay leaves till they crackle.

3. Then add the spice paste and keep stirring until colour deepens and oil floats on top.

4. Time to add the marinated chicken pieces, stir until they are coated in the spice mix, add dry spices now.

5. Add a cup of water to thin out the mixture for more gravy. Cook for five minutes.

6. Add grated tomatoes to the curry. Let it cook and simmer for 15 minutes with lid on untill chicken is tender.

7. Now add salt after tasting.

8. Garnish with coriander leaves.

9.Serve hot with fluffy white rice and a cachumber on side .


Suggestions

Add potatoes to curry if you want.
Also you can add coriander to the gravy when it cooks, the flavour will be enjoyable.
To make things easy, I make a big batch of curry paste and store in the deep freezer to use as per my convenience.
 

Saturday, 7 April 2018

Boiled egg Bhurji- New style


It was Sunday  morning in the Irani household. Time to make the special Akuri. But today I was not in the mood to cook up the usual Akuri, so tried out something different. 
It is made with hard boiled eggs and is equally tasty. It is a simple egg dish that can be prepared as easily as Akuri for Sunday breakfast. 

Boiled egg bhurji


Recipe for Boiled egg bhurji


Ingredients

4 eggs
I big onion small2
2 tomatoes
I tsp Ginger garlic paste
1 green chilli
Pinch of turmeric powder
Half  tsp red chilli powder
Half tsp coriander powder ( dhania powder )
Pinch of garam masala powder
Coriander leaves
2 tsp oil
Salt to taste


Method. 


1. Boil the eggs for 6-8 mins.
2. Finely chop onion, tomatoes and green chilli.
3. Remove the shells of eggs and chop them into about 2 inch pieces and keep aside.
4. Heat 2 tsp oil in a pan
5. Add chopped onions and chilli and saute till the onions turn pinkish and translucent.
6. Then add chopped tomatoes and mix well
7. Add turmeric powder, red chilli powder, coriander powder and garam masala powder and stir well.

 
8. Saute  for a couple of minutes till tomatoes turn soft
9. Add the chopped boiled eggs.
10. Stir the eggs with a light hand till the eggs get coated with the masala.
11. Garnish with chopped coriander leaves.

12. Now  serve boiled egg bhurji with rotis or toasted bread slices.


This was a great dish and was cooked up in no time. It was yummy  and refreshing. 


For the authentic Parsi Akuri Recipe you can click here to make it.SweetAnnu Akuri

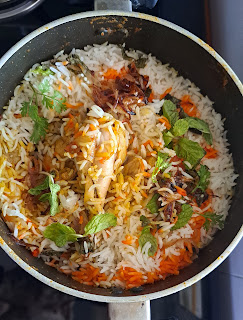
Easy One pot Chicken Biryani

  Easy One pot Chicken Biryani  No fuss steps infact a one pot preparation with a flavourful outcome!  "Fall in love with the irresisti...