Showing posts with label sweet dish. Show all posts

Wednesday, 8 June 2022

Easy Makhana Kheer Recipe

 Makhaha Kheer Recipe


Makhana Kheer (Makhane ki Kheer) is a creamy Indian Dessert made using fox nuts, milk, dry fruits and sugar(I substituted it for honey).

This kheer is creamy, delicious and nutritious, and doesn’t take much time to prepare. It is light yet very indulgent. It makes delicious sweetdish which can be served on any occasion or for vrat or fasting.

MAKHANA KHEER


The makhanas roasted in ghee and simmered in milk, sweetened  with honey and garnished with nuts and some saffron, it is perfectly balanced and a guilt free dessert option.
Detailed ingredients and recipe below

INGREDIENTS


2 tablespoons ghee
1 large bowl makhana (foxnuts)
1 litre whole milk
15-20 strands saffron
2 tablespoons slivered almonds
2 tablespoons slivered cashew nuts
2 tablespoons raisins
1/4 cup Honey


Makhana Kheer


METHOD


1. Take one tbsp ghee, melt it in a pan and lightly roast the Makhanas on low flame for 4 to 6 minutes. The makhana should crack between your fingers when checked.

2. Now take half the quantity of makhana and dry grind it in the mixer to make a coarse powder.

3. In the same pan add another tbsp ghee and roast the nuts and raisins for two minutes till brown and aromatic.

4. Boil one litre milk in a pan, now add the saffron and boil on low flame for 5 to 8 minutes.

5. Add the makhana powder and rest of makhana nuts and boil further till it thickens

6. At the end add honey when about to switch off the gas and garnish with roasted nuts and raisins

7. Serve it hot or cold and relish this Makhana kheer.

Wednesday, 8 September 2021

Sugar Free Modaks for Ganesha with honey and tutti frutti


Sugar Free Modaks for Ganesha with Honey and tutti frutti 

This year let's enjoy Bappa this season  and gorge on modaks without any guilt.
So yes I put on my chef's cap and got my hands all messy and sticky with the purest of honey.
The honey is organic, raw and the best substitute for sugar in my recipe.  The recipe is simple to follow and the modaks  turned out delicious.

So note the ingredients for the recipe and get it done before Bappa arrives

Ingredients

For Modak

 
1 litre Milk
3 tablespoons Milk powder
2 tbsp Pure Honey
1 tsp Ghee
2 tbsp Tutti Frutti bits
1/2 juice of lime

For filling

1 cup assorted nuts ( almonds, walnuts, pistachios, cashews)
2 tbsp Honey


Sugar Free Modaks for Ganesha with Honey and tutti frutti


Method

1. For the filling, mix the nuts and Honey together and keep aside. You can give it a spin in the mixer.

2. Now add the Milk to a pan and boil. Squeeze the juice of half a lime.

3. Boil till the milk curdles and water separates from mawa.

4. Strain the whey and collect the mawa in a muslin cloth.
Remove all the water and transfer it to a dish.

5. Now add the Milk powder,  honey, tutti frutti and ghee and mix well to make a soft dough.

6. Now put this dough in the refrigerator for an hour, so that it gets firm.

7. To make Modaks, you will need a modak mould. Oil your hands, before you start making the modaks.

8. Now take the mawa filling and add to the greased modak mould, keeping the centre empty.

9. Add the filling in the middle of the mould.

10. Seal the modak mould, with mawa mixture and then press firmly before unmoulding.

11. Unmould the modak and make the rest of the modaks the same way.

12. You will make approximately 12 to 13 modaks  with this recipe. 


Sugar Free Modaks for Ganesha with Honey and tutti frutti


Now enjoy these modaks with Bappa. I hope liked my sugar free modak recipe.  Give this recipe a try to please Lord Ganesha. Do not forget to give your valuable feed back in the comments section.

Wednesday, 12 May 2021

Candied Orange Chocolate Peels


I am utilizing my second lockdown period as well as I first.  This quarantine time I tried to reduce my scraps to convert them into foods that can be consumed. For starters I tried to convert the peels of oranges into some delicious treats – Candied Orange Chocolate Peels.

Candied fruit has existed since the 14th century. It was served in Arab culture at banquets before spreading to the West where it became a key ingredient of some of the most famous sweet dishes such as Panettone.


I admit I've often binned orange peels. But this time I tried this recipe with orange peels and Voila!! Made these dynamite sticks of deliciousness. Candied orange peels are not only a tasty sweet treat, but also are great to add to cake batters. So note the ingredients and recipe for this.


Ingredients


Peels of two oranges
1 cup of sugar + extra for coating
2 cups of water
1 tsp. vanilla extract
Half cup melted chocolate


Method


1. Thinly slice the orange peels into long strips.

2. Now boil them in water for 15 minutes to  and boil in water to remove  the bitterness.

3. Now drain the orange peels and repeat this process one more time. 


4. Now take a pan, add 2 cups of water,  1 cup of sugar, vanilla extract and the orange peels. 


5. Bring to a boil again, then reduce the heat to a simmer. 


6. Simmer this for about 30-35 minutes until all the liquid has dried up. 


7. Use thongs to remove orange peels and keep aside to further dry for minimum 8 hours. Or you can keep it overnight. 


8. Now melt some dark chocolate. Dip each orange peel into melted chocolate. Set it in the fridge to harden.


Now enjoy this candied orange chocolate peels, Its going to be a new obsession.

Wednesday, 10 March 2021

Carrot Rice Pudding/ Gajjar ki Phirni

 Carrot Rice Pudding/ Gajjar ki Phirni

Weekends are always the time to try out desserts. And I especially like to try out Indian sweet recipes in my kitchen. So today, I am trying a new recipe today, phirni with a twist. Adding carrots to the dish proved to be a good idea in this dish, so before the Indian carrot season (the one we make gajjar ka halwa with) was over I prepared Gajjar ki phirni....


Ingredients

2 Carrots

4 cups Milk-3 cups

½ cup Jaggery

½ cup Basmati rice

½ tsp Cardamom powder

6-8 Almonds

4-5 strands of saffron


Method


1. Start by soaking the basmati rice in the water for an hour. Strain the rice, and then grind the rice with this remaining water in a grinder until you have a fine paste.

2. Grate the carrots and keep aside.
3. Now
in a saucepan, heat the milk and add the grated carrot and cook for ten minutes.

4. Add the rice paste and mix it with a whisk so as to ensure that no lumps remain.

5. Add the jaggery granules, and slow cook the mixture.
6. Keep stirring so it doesn’t burn at the bottom.

7. Now add the ground cardamom, and saffron to the thickened mixture.

8. Set the firni in terra-cotta or glass bowls and refrigerate, covered.

9. Garnish with crushed almonds and serve chilled.


Carrot Rice Pudding/ Gajjar ki Phirni


Now enjoy a chilled bowl of phirni and give in to your sweet tooth cravings. This is just another a worthy treat, like creamy traditional pudding 'Phirni' loaded with the goodness of carrots. Welcome your weekends on a sweet note.


Friday, 7 August 2020

Easy Silky Eggless Mango Pudding


For Silky Mango Pudding

Stirred up a simple silky mango pudding before the mango season gets over. Only a few varieties of mangoes are available in the month of August.  And I had to make do with the green variety called Chausa  is Hindi. It's a dark green color skinned mango but very sweet and pulpy.


silky Mango pudding


This was a  really smooth and soft mango pudding and is vegetarian with no eggs used. I used gelatin as a setting agent in the pudding. The original recipe uses gelatin. You can use agar  agar as an option too.

Note the ingredients for the silky Mango Pudding.

Ingredients 


2 cups mango puree
Half cup milk
2 tbsp sugar
Half cup fresh cream
1 sachet gelatin crystals

For Garnish
Few mango pieces
Cashew
Mint leaves 


Method

1. First wash the mangoes,  peel the two mangoes. Roughly chop them into pieces. Then add it to a mixer or blender jar. And blend to a fine pulp.

2. Dissolve one teaspoon of gelatin (or one sachet) to half a cup of milk. Make sure the milk is not cold.

3. Now take a pan and add the mango puree. Set the temperature on a low flame and keep stirring.

4. Then add 2 tablespoons sugar. Sugar can be added less or more depending on the sweetness of mangoes. Since the mangoes I used were very sweet, I added only 2 tablespoons of refined sugar.

5. Also add the cream and stir till it's all mixed well together

6. Add the milk and gelatin mixture and stir for 5 minutes till the mango puree thickens ( white sauce consistency)

7. Turn off the fire and let it sit for 5 minutes 

8. Grease the pudding bowls with some cooking oil.  Pour it into the dessert bowls and place it in the refrigerator to set for 4 - 5 hours.

9. When the pudding is set you can unmold it onto a dish. Garnish it with mango cubes, few cashew nuts and mint leaves.

10. Now it's time to enjoy your chilled silky mango pudding. 


Note

You can use agar agar as a thickening agent instead of gelatin.

Or try it with another fruit if you wish.

Tuesday, 28 April 2020

w - Whole wheat Flour/Atta Ladoo Recipe

 Whole wheat flour Ladoo Recipe 


Craving something sweet and healthy during a lockdown? Well, I found the perfect recipe while surfing Facebook
It was this fabulous post by Chef Suunil G Murudkar who had posted great drool-worthy images of his homemade Whole Wheat flour Ladoos. 

whole wheat flour ladoo recipe

When I asked him for the recipe he happily shared it with me.
So I will dedicate this post to his delicious Whole Wheat Ladoos

Note the recipe of Whole Wheat Ladoos 


Ingredients


3 cups wheat flour
2 cup castor sugar
1 cup ghee
1/2 cup powdered nuts

whole wheat flour ladoo recipe


Method


1. Take the wheat flour in a heavy bottom pan.

2. And roast it on low flame. Constantly stir the flour as it may burn from the bottom. Constantly stir it for 8 to 10 minutes.

3. The flour will turn light brown in colour. See that there is an aroma of the flour. That will let you it has  been roasted well.

4. Now bring it to room temperature.

5. Once on room temperature add the powdered sugar and ghee.

6. Also add the powdered nuts and bond with your hands.

7. Later roll them into ladoos.

8. Store in an airtight jar.

Thank you  Chef Suunil for such an easy and nutritious recipe. 

About  Chef Suunil G Murudkar

He has been working as chef trainer in culinary school in Dubai. Started working as home chef, worked with some well known food apps as on board chef. Along with cooking doing food photography for more than 12 years with some hotels, restaurant and chefs. Special interest in cooking Persian food.


Thursday, 16 April 2020

N - Easiest Nan Khatai Recipe

Hello Friends, 


Nan Khatai is one recipe I had first learned way back in my school days.
I vividly remember my home science teacher Mrs. Singh explaining and mixing the cookie dough while demonstrating the recipe.


These cookies are made in different ways. Some make it with eggs, while others do an eggless version of the same. cookies are made in so many different ways. It can be made with either maida or gram flour.
They are very easy and can be made from start to finish under 30 minutes. I hope you like my recipe and will try this out. Do let me know how it turns out.

Nan Khatai


Ingredients


2 cups Refined flour (maida)
1 cup Castor Sugar
1 cup of oil
1 tsp Nutmeg powder
A few nuts


Instructions


1. Sift the flour, sugar, and nutmeg together through a sieve.  Do this twice.

2. Transfer the mixture in a bowl and add oil now and mix it into a dough.

3. Divide it into equal balls. Flatten it to make a round cookie shape.

4.Make an X shape on each nan Khatai and place a nut on the top. You can use almonds or Cashews on the top.

5. Preheat the oven at 200 ° Celsius.

6. Grease the baking tray with oil and place the ban khatais on the tray keeping an one-inch gap. As the cookies will swell in shape after baking.

7. Now bake the nan khatais for 15 t0 18 minutes at 180° Celcius.

8. After baking, let the nan  khatai cool down before taking them off the tray

9. Add the milk only if the mixture seems dry.


My School time Recipe Book


Saturday, 11 April 2020

J - Easy Jalebi Indian Dessert Recipe

 Hello Friends.
Today I write a sweet Recipe for the Letter J - Easy Jalebi Indian Dessert Recipe, #BlogChatterA2Z Challenge 2020.

I needed to fix my sweet cravings for Jalebis. So today I made a batch of those beautiful round juicy circles that a delightful to savor hot and cold. Jalebis are prepared on auspicious occasions or festivals. But I have discovered an easy recipe, in fact, an instant one. The batter can be even stored in the freezer to be used at a later stage when needed.


Easy Jalebi Indian Dessert Recipe,


Ingredients

1 cup Maida
4 tbsp powder of Urad Dal powder
2 tbsp Ghee
1 sachet Eno
1/2 juice of a lime
Water to make the batter
Cooking oil

For the sugar syrup

500 gms Sugar
Kesar / Saffron few strands
Kesar color few drops
250 ml of water


 Method 


 For the sugar syrup

1. Take a saucepan, add one cup of water, sugar, Kesar strands, and yellow color. Stir it on low flame and bring it to a boil.
 2. Keep stirring on low flame,  cook further for 2 minutes. The syrup should be thickened enough in   consistency. Let it cool and set aside for later. 
 
 For making the jalebi

 1. Take the Urad dal and grind it to a fine powder. Strain the dal and keep aside.

 2. Now in a mixing bowl combine maida, urad dal powder, Eno powder, lime juice and the ghee. Using your hand to gently kneed the mixture. Add a little water to make it a smooth paste.

3. Now add the mixture into a piping bag and snip the end to make a small hole for the mixture to come out.

 4. For frying the Jalebis, pipe the batter into small circular patterns, directly into the oil for frying. 

5. Heat the oil in a pan, and dip the jalebis in medium oil.

6. Fry on both sides till light brown in color. 

7.  After the jalebi is brown, remove the jalebi and dip them in the sugar syrup you have prepared earlier. 

8. Soak the Jalebis for a minute and then remove onto a serving plate.


Easy Jalebi Indian Dessert Recipe,


 Once all the jalebis are done,  garnish with some chopped pistachio and serve the yummy Jalebis hot.


Monday, 8 April 2019

HOW TO MAKE PARSI STYLE RAVO/SEMOLINA

HOW TO MAKE  PARSI STYLE RAVO/SEMOLINA 


Happy occasions call for sweet preparations being made at home. Parsi style Ravo is definitely one of the dishes made in our household.  dessert recipe at home. Parsi Style Ravo is prepared with semolina, milk and dry fruits.
I remember my grandmother telling me that she used to add an egg while cooking the rava with milk.

Parsi Style Ravo


This sweet dish needs to be cooked on slow flame while constantly stirring it. It has a creamy texture and looks like porridge. Garnish lavishly with nuts and raisins and its set to get served.  Also, use a very fine grain of Semolina to enhance the texture.


Ingredients - Makes 6 helpings

1 cup semolina (rawa)
1 1/2 cup sugar
1 cup butter/ ghee
3 cups of milk
2 cups of water
Few strands of saffron
2 tbsp Rose water
1/2 cup charoli/ raisins/ nuts


Method

1. Soak the saffron in a little water before you start preparing.

2. Take a heavy bottom pan or kadai. Add the ghee leaving one teaspoon for roasting the nuts. Heat the ghee on low flame.

3. Now add semolina and stir it well. Roast the Ravo till it lightly changes colour and emits a nice nutty aroma.

4. Now, pour water in it along with sugar and stir the mixture continuously. Cook until mixture becomes thick.

5. Add saffron and rose water at this stage.

6. Now add the milk stirring continuously on medium flame.


7. Cook the mixture until ravo thickens like a soup consistency. Turn off the gas. The mixture will further thicken on cooling.


8. In another frying pan, take one teaspoon ghee and roast the raisins and nuts.


9. Now serve Parsi Style Ravo garnished lavishly with charoli and kismish.

Note

Do not add Cardamom to this dish or it will taste like Sheera. Too many ingredients spoil the taste. Rose water and saffron are just perfect for Parsi Ravo recipe. You can add vanilla essence instead of rose water.

Parsi style  Ravo


This is my grandmother's recipe and I am happily sharing it with you all.


Sunday, 10 February 2019

Indian PIneapple Halwa Recipe

Hello friends,

 Love is in the air with Valentine's Day round the corner. So lets cook up something sweet. An Indian desserts this time, a halwa that is super special. I remember savouring Pineapple Halwa at a Bohri friends place. The sweet follows and savoury in a Bohri Thala and Pineapple Halwa was what I truly relished that day.


Recently,I tried to make a Pineapple Halwa recipe that turned out quite good. I have cut down on using ghee in my recipe.  Sharing the easy recipes with all of you. The halwa  is a very popular Indian sweet dish made with Rawa and pineapple. It tastes sweet and sour and has bits of chunky pineapple pieces, really enjoyable.


Ingredients

1 cup Semolina (Rawa)
3/4 cup Ghee
1 cup sugar
2 cups water
1 tsp powdered Cardamon (Elaichi)
1 cup chopped Pineapple
1 cup Pineapple Puree
A few nuts and Raisins

Method

1. Heat half the ghee in a pan, when it is hot add one cup semolina and start roasting it.

2. Keep roasting on slow flame till the rawa turns brown and you get a good aroma. Turn off the gas and take out the semolina on a plate for using later.

3. In the same pan, add the pineapple puree and sugar and stir for 5 minutes.


4. Now add one cup pineapple pieces, cook the pineapple is soft and mushy.

5. Now add 2 cups water and bring to a boil. 

6. When the water boils, add the semolina back to the pan and mix it well. 

7. Add the cardamon powder to this mixture. 

8. Cook the halwa on low flame till the ghee leaves the side of pan. The mixture should be dry and rawa cooked through. 

9. Add the remaining ghee and roast for two minutes more. 

10. Garnish with chopped raisins and nuts.

11. Serve it hot or cold with a scoop of vanilla icecream. 


The video below has a step by step recipe so do refer and cook up a tasty pineapple halwa for all at home for Valentine's day. 


Bon Appitet 🍍🍍🍍🍍
Top post on IndiBlogger, the biggest community of Indian Bloggers

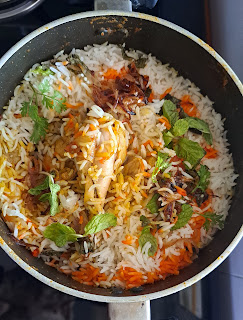
Easy One pot Chicken Biryani

  Easy One pot Chicken Biryani  No fuss steps infact a one pot preparation with a flavourful outcome!  "Fall in love with the irresisti...