Friday, 25 January 2019

Wafer par Eedu - Eggs on Potato Chips


Today's recipe is a special Parsi Recipe. We, Parsis love our eggs in any form. Omelettes, scrambled, sunny side up but best of all we love our eggs on something. Eg- Bhaji par eedu, bhindi par eedu but best of all, if no vegetable is available. We grab a packet of Wafer/Salli and throw some eggs on it, then we happily savour our Wafer par eedu (egg on potato wafers/ sticks) 

Wafer par eedu


Parsi Wafer par Eedu is simple to make and so delicious!  The best part of this recipe is that there are no specific ingredients, you can add or minus according to what is available in your kitchen. But the technique is more important to get that perfect flat wafer par eedu that can be enjoyed as a starter, snack or during meal time.


Ingredients


1 teaspoons oil

Half cup water
250 gms potato chips
1 small green chilli
Salt to taste
1 tsp pepper powder

4 egg
2 tsp chopped coriander leaves

1/2 tsp paprika
1 tbsp tomato ketchup ( optional)


Method


1.Take a medium sized frying pan. Switch on the gas, once the pan is hot, lower the flame. Add the oil and water. 

2. Add the wafers/potato chips to dish. 

3. Add the chopped chilly, salt, half tsp pepper and tomato ketchup. Don't add too much salt as wafers already have salt content. 

4. Gently mix this with the soft wafers and gently push down so that there aren't any huge gaps in the wafers and you get something of an even base.

5. Add some chopped coriander leaves to the top of the wafer mix. 

6. Before cracking the eggs on top, see to it that the wafer mixture is not completely dry as we don't want it to burn at the bottom.  Add water if need be. 

7. Now break four eggs on top of the wafers. Sprinkle salt, pepper, paprika and coriander leaves. 

8. Cover with a lid and continue cooking on low-moderate heat for 3-4 minutes.

9. Continue cooking until the egg white is no longer transparent in colour and has turned white. Switch off the gas when eggs are semi done as they cook in heat when the flame is turned off. 

10. Serve the dish immediately. A cold wafer par eedu will not taste as yummy. 


Note
You can beat the eggs too, instead of putting the whole eggs on the wafer mixture. 

Now enjoy your Wafer par eedu hot and with a dash of ketchup.  Coz I believe that Khavanu, Peevanu, Majje ni life!!

Top post on IndiBlogger, the biggest community of Indian Bloggers

Sunday, 20 January 2019

Healthy Orange/Tangerine Chicken Recipe

Hello friends,

Oranges are in season and oranges are the main ingredients of this dish today. Those big juicy sweet tangerines made me want to create a recipe with them. I have heard of Orange chicken and tasted it too. In a restaurant in Bangkok, however it was deep fried and served with rice on the side. I didn't want to deep fry and use excess oil so make a wok style stir fry orange chicken today.


Tangerine/Orange chicken


This quick dish gets its flavor from fresh Orange and tangerine juice and rind of the peel.  To make easy work of grating the peel, choose tangerines with firm skin and store them in the refrigerator.


Ingredients


250 gms boneless chicken
1 1/2 cup fresh tangerine or orange juice
1 tbsp Soy sauce
1 tbsp honey
1 tsp ginger garlic paste
1/2 tsp red chilli flakes
1 teaspoon dark sesame oil ( or regular oil )
1 tablespoon freshly grated orange zest
2 tangerines, seeded and thinly sliced
1/2 cup chopped fresh broccoli
A pinch of salt
Sesame seeds for garnish


Method


1. In a medium bowl whisk together tangerine juice, soy sauce, honey, sesame oil, garlic ginger paste, chilli flakes and orange zest.

2. Wash and clean the chicken. Now cube the chicken in small pieces.


3.  Place chicken in a large zip-top plastic bag. Add half of the tangerine marinade; seal and toss gently to coat. You can also prepare this marinade in a mixing bowl.

4.  Refrigerate for minimum 2 hours. Cover if you have done in a bowl.

5.  Now heat a wok and transfer the chicken mixture to it. Add the remaining tangerine/orange marinate.

6. Let it broil on slow till juices evaporate and chicken gets coated with an orange glaze.

7. Add a pinch of salt or as required to taste. Tip in the broccoli and saute for two minutes.

8. Garnish with sliced segments of oranges. You can grill then too, slightly for 30 seconds.

9. Now garnish with orange zest, finely chopped spring onion greens and sesame seeds.

10. Arrange orange slices and pieces around chicken.


11.  Serve it like a starter or with sticky jasmine rice.


Top post on IndiBlogger, the biggest community of Indian Bloggers

Monday, 14 January 2019

Methi Matar Malai


Hello friends,

Happy Makar Sankranti, Lohri and Pongal to all my readers. Hope you all are enjoying winter chills and hot delicious home cooked food. Do so as the winter won't last for a long time.
Today I am making yet another winter special dish -  non spicy yet interesting dish with addictive flavours. Any guesses?
With greens available in abundance in this season,  I decided to stir up Methi Matar Malai. Methi Matar Malai is a north indian dish which is not so spicy unlike most north indian dishes.

Methi Matar Malai

The whitish green color, comes from cashew, milk and Methi leaves. The creamy texture and the subtle flavours makes it an enjoyable dish. I substituted cashews to make it more healthy and lessen the calories.
My Methi Matar Malai recipe is fairly simple to make and tasted some what like what you get in the restaurants. The sweet taste of milk, cream and peas and bitter spicy taste of Methi is a winning combination.


Ingredients


1 cups Green Peas
1 bunch of  chopped Fenugreek leaves (methi bhaji)
2 Green Cardamom (elaichi)
1-inch piece of Cinnamon ( Dalchini)
1 medium Onion, chopped
1 tsp ginger - garlic paste
1 Green Chilli
2  tbsp Fresh Cream
1/2 cup Milk
1/2 tsp Garam Masala
1/2 cup Water
Salt to taste
1 tbsp cooking  Oil

Method 

1.Clean the methi leaves from their stem, wash it  thoroughly in running water. Squeeze and chop them roughly. Now set it aside. 

2. Boil the peas and then transfer then in cold water to retain green colour.  

3. Heat 1 tbsp cooking oil in a deep bottom pan.

4.  Once the oil is hot, add cumin seeds and wait till the seeds crackle.

5. Then add onions, green chilli, cardamom,  cinnamon, ginger/ garlic paste. Stir and let the rawness of onion go and saute for two minutes more. 

6. Let the pan cool down a bit. Then transfer the entire mixture into a mixer. Add a little water if need be and grind into a smooth paste. 

7. In the same pan, saute the mixture for few minutes. Now add the milk and give it a good mix. 

8. Once it comes to a little boil, add the chopped methi leaves and mix.

9. Add boiled peas after two minutes and keep stirring. 

10. Add garam masala, salt and cream and mix well.  Cover and let it simmer on medium-low flame for 4-5 minutes.

11. Once the methi leaves cook and gravy is slightly thickened, switch off the gas and let it cool. The dish will thicken further. 

12. Serve it with hot parathas/ rotis, salad and a dollop of homemade butter.

Methi Matar Malai


I made a batch of methi rotis along with Methi Matar Malai.  
Double dose of Methi, double the of flavoursome food.

Check out my previous Methi Matar Masala recipe 

Happy Cooking!!


Top post on IndiBlogger, the biggest community of Indian Bloggers

Saturday, 5 January 2019

Omelette Curry Recipe

Hello friends,

Hope you are sticking to your New Year Resolutions to eat right and stay healthy. I have decided to keep cooking and stirring up healthy recipes for you all. Easy, nutritious and tasty!

Omelette curry


Today, I wish to share a spicy omelette curry recipe. It is a very different version of bolied egg curry, which is sometimes boring. This dish is innovative and goes very well with rice or chapati.


Ingredients

For making Omelette

3 eggs
1 tbsp coriander leaves
1 chopped green chilly
Half onion
Salt to taste
1 tpsp oil

For making gravy 

2 onions
3 tomatoes
1 tsp ginger garlic paste
1tsp red chilli powder
1 tsp coriander powder
1/2 tsp turmeric powder
1/2 tsp cumin seeds
1 tsp Oil
Water

Method

For omelette

1. Take a bowl, break three eggs and beat with fork.

2. Now add half coriander leaves, half chilli, half onions and a pinch of salt.

3. Mix all the ingredients  well.

4. Heat a frying pan and sprinkle some oil on it.


5. Pour the omelette batter on the hot pan and spread it all over the pan and cook till it is brown from beneath.

6. Now flip the omelette and cook it on the other side as well.


7. When its done, take it out from the pan and cool. Then cut it in 1/2 " pieces.

8. Keep this aside for further use.

For the Gravy

1. Heat oil in a  kadai deep bottom dish.

2. Once oil is hot add cumin seeds and let it crackle.

3. Now add chopped onions and cook till they get soft and pinkish in colour.

4. Add ginger garlic and saute for one minute.

5. Add the finely chopped tomatoes and 2 tbsp of water at this time and cook till tomatoes are soft mushy and oil separates.

6. Now put this mixture in a mixer and blend to make a paste. ( you can avoid this step altogether)

7. Transfer it back in the kadai, add turmeric powder, red chilly powder and coriander powder and mix it again.


8. Stir for 5 to 6  minutes, keep mixing after every few minutes to avoid burning at the bottom.

9.Once the oil separates, add little water at time and cook the gravy. Add salt here.

10. After gravy starts boiling switch off the heat and gently put omelette pieces on it.

11. Garnish with chopped coriander leaves.

12. Serve it hot with rice or hot fresh rotis.

Omelette curry


Note :

* Infact you should add omelette pieces only when you are ready to serve it.
* Add cheese to the omelette for variation.
* Tamarind can be added instead of tomatoes.


Top post on IndiBlogger, the biggest community of Indian Bloggers

Sunday, 30 December 2018

Easy Strawberry ice cream without an ice cream maker


Hello Friends and foodies,

This happens to be my last recipe of 2018. This year, through my blog posts I only to brought you easy recipes that could be easily stirred up at home in minimum time and with ingredients found in the kitchen or are in season.
So lets make it extra special with strawberries. Strawberries are in season and the reason for my last recipe of 2018.
Basically I am not such a big fan of strawberries. They sometimes turn out so sour to kill the joy of biting into one. But give me a milkshake or Ice cream and I will truly relish it.
With an extra box of sour strawberries, this time I churned up a tray of ice cream without an ice cream maker. So note the ingredients and make a dreamy creamy ice cream in the New Year before the strawberry season is over. 


Strawberry icecream


This strawberry ice cream is so easy to make, you won’t believe it. There are basic 4 simple ingredients, plus a pinch of lime to balance the flavors. You will need fresh cream or a can sweetened condensed milk for this recipe. This strawberry icecream recipe doesn't need an ice cream maker. 

Strawberry icecream


Ingredients

litre milk
1 cup sugar
1 box or 500 gms fresh Strawberries
200 gms Fresh Cream  ( Amul  or any other brand)
Few drops of  Vanilla/ Rose Essense
A dash of lime juice

Method.

1. Keep the milk for boiling. Let it cook on low flame till it reduces to 2/3 quantity.
2. Add sugar and keep stirring till sugar is dissolved and milk is thickened. Approximately for 20 minutes.


3.  Now puree 2/3 of the strawberries until it gets into a smooth paste in a mixer.
4. The rest of the berries can just be roughly chopped. Because they were sour, I added two tablespoons of sugar to this. Add essence and a dash of lime. Press with a fork, mix well and let it sit for 10 minutes.
5. While the milk is cooling, take a large mixing bowl and with the help of an electric mixer,  whip the fresh cream until it gets light and fluffy. For approximately 6-8 minutes.


6. Fold in the fresh cream, strawberry puree to the milk. Mix it well.
7. Now add the chopped strawberry mixture to this.
8. Transfer this to a freezer container and freeze for one hour.
9. Remove from freezer and beat up the mixture again with a ladle. This prevents crystals from forming and makes ice cream smooth and pulpy.
10. You can repeat the process if desired.


Homemade Strawberry icecream


Before serving, let the ice cream thaw for ten minutes. Serve up this creamy strawberry icecream with chopped strawberries or crushed chocolate cookies, it tastes simply yummy. 

If you need to keep Strawberries fresh for a long time - read here

Wishing all my readers a very Happy New Year and greater cooking times ahead with Sweetannu in 2019.

Top post on IndiBlogger, the biggest community of Indian Bloggers

Friday, 28 December 2018

Quinoa and shrimp salad


Hello food lover my name is Neha Singh and I am owner of Healthy Shrimp Recipes Blog today I am here to guest posting and make Quinoa and shrimp salad for you and Many thanks to the Owner of this beautiful blog Anahita Irani Mam to give me chance to posting shrimp recipe as a guest blogger

So let's start to make delicious Quinoa and shrimp salad  

Quinoa and shrimp salad

Delicious, useful and simple salad recipe with shrimps and Quinoa in front of you! Try it yourself; you will like the taste, the look and the ease of preparation. Guests will appreciate the new taste!

Quinoa is a very tasty, but light cereal, which is very often combined with seafood. Especially shrimps with quinoa - delicious and tasty salad. I recommend the recipe!    
     
Quinoa and shrimp salad reminds of summer and because it is light and very fragrant; leaves give it a special mood. Even gourmets will find the combination of foods appropriate

Preparation of Quinoa and shrimp salad


To prepare a salad with quinoa and shrimps, you can take both white and red cereals. By the way, it looks very impressive if you mix two types of quinoa.

My shrimps were freshly frozen, but not boiled, so I fried them. You can sprinkle the finished salad with lemon juice.

Ingredients Quinoa and shrimp salad

  • Quinoa - 2 Glasses
  • Water - 3 Glasses
  • Baby spinach - 400 grams
  • Feta Cheese - 250 Grams
  • Salt, pepper
  • Olive oil - 2 spoons
  • Garlic - 2
  • Shrimp - 450 Grams 

How to Make Quinoa and shrimp salad


Step 1 - Quinoa, rinse fills with water and put to boil, after boiling reduce the heat and cook for another 15 minutes. Then allow the quinoa to cool. Rinse the leaves of spinach; connect them with the cooled quinoa.


Step 2 - Cut into cubes, add to quinoa and spinach Salt and pepper to taste.


Step 3 - Heat the olive oil; add the chopped garlic and paprika. Fry until the garlic gives flavor (minutes 5). Then put the shrimp, fry them for 1-2 minutes on each side (until golden brown).


Step 4 - Put quinoa with feta and greens in a salad bowl, and place shrimps on top, you can mix gently Salad with quinoa and shrimps ready.


Here you testy and healthy shrimp recipes salad is ready enjoy your food with friend and family if you have any drought and suggestion please share your thought in comment box


Thanks. Enjoy your meal!

Top post on IndiBlogger, the biggest community of Indian Bloggers

Monday, 24 December 2018

Guava Cheese Recipe

Hello friends,

Jingle bells, jingle bells !!
Jingle all the way !!
The Christmas spirit is in the air. And Its simply  possible to stop indulging in yummy Christmas sweets. All those Mazipans, Kulkuls, Milk creams, plum cakes and my most favourite Guava Cheese. It is also  popularly known as 'Perad'. 


Its a famous sweet made in Goan homes during Guava season, the Guava Cheese is much-loved by kids and adults because its delicious rich fruity flavour and that mild lemony tinge! It takes a strong hand to stir up a batch  but is completely worth the effort.
 This year I decided to make a batch of Guava Cheese at home. After a day of watching YouTube videos and going through some recipes,  it was time to make Guava Cheese! 


Guava cheese


Ingredients

1 kg ripe Guavas 
2 cups sugar
1 tbsp ghee
1 tbsp lemon juice
Few drops of pink colour 


 Method 
  1. Cut the ripe guavas into halves. Pressure cook the guavas with 1 cup of water in a pressure cooker for two whistles. 
  2. Let the steam escape before opening the lid, drain the water and cool completely.
  3. Add the cooked guava halves in a mixer and blend till its a smooth pulp. 
  4. Put the mixture in a strainer/ mesh and strain with a help of a spoon to remove the seeds from the pulp.
  5.  Now measure the pulp in a cup. For instance if you have two cups of pulp then add two cups of sugar. The pulp and sugar ratio should be 1:1.
  6. Take a wide bottom vessel and add the pulp, sugar, ghee and lemon juice.  
  7. Keep stirring well and cook on a medium flame for approx 30 minutes. Do not let it stick to the bottom.
  8. The mixture will start to thicken. You can tell when its done. It will start moving together like a whole mass. 
  9. With the help of a spatula, transfer the mixture in a greased rectangle aluminium tray.
  10. Keep aside for it to cool down completely. Chill in the fridge if need be. Then cut into rectangles , squares or diamond shapes. 


Perad or Guava cheese


Note 

 If you want to make it look more attractive, you can add food colour.  Make sure you let it cool for two hours before cutting, otherwise it might still be sticky and difficult to cut neatly. Dont make tje mistake I made or you will get sticky Gyava cheese. You can also store it in a jar like a jam. Eat with toast or roti. 


This recipe might be a little laborious than my other easy recipes. But then Christmas comes once a year, isn't it. And we do it with love. ❤❤❤❤❤

Wishing all my readers a Merry Christmas and a happy New Year. 🎄🎁🎅🍭🎈


Top post on IndiBlogger, the biggest community of Indian Bloggers

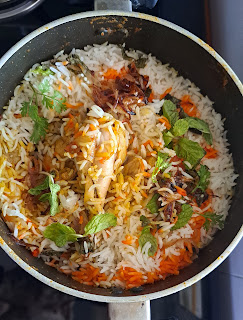
Easy One pot Chicken Biryani

  Easy One pot Chicken Biryani  No fuss steps infact a one pot preparation with a flavourful outcome!  "Fall in love with the irresisti...