Tuesday 24 December 2019

Chicken in apple sauce - Christmas recipe


Merry Christmas Friends!!

Every Christmas Season I try to stir up something new and interesting. It was Christmas eve so how could I not do a chicken recipe.

Chicken in apple sauce

With abundance of apples in the market against the steep rising prices of onions, I asked a few of my Instagram friends for recipes with apples. A foodie friend suggested Apple Chicken but a crumb fried version. I took his suggestion seriously however I did another simpler version of Chicken in apple sauce.


The sweetness of apples while combined with spice of green chilly did the trick with flavors. Cream and cashew adds to the richness of the dish, afterall it is a happy occasion of Christmas and a little indulgence is permitted.


Ingredients

1 tbsp cooking oil
500 gms Chicken pieces
2 apples
Handful of cashew nuts
1 tsp ginger - garlic paste
2 green chillies
1 tbsp fresh cream
1 tbsp barbecue sauce
Salt/ pepper to taste.

Method


1. Wash the chicken and apply ginger garlic paste, barbecue sauce and keep aside.
2. Coarsely chop the apples, remove seeds and skin.
3. In a large skillet, heat oil over medium heat. Add the cashew nuts, green chilies  and chopped apples. Saute on medium heat for 2 -3 minutes.
4. Now switch off the gas and grind the apple and cashews to make a paste.
5. Brown the chicken in the same pan and cook for five minutes turning on both sides.
6. Stir in the apple puree, pepper and salt.
7. Cover and cook  the mixture till chicken is done.
8. Keep the frame and low, and add the fresh cream to the chicken. 
9. Let the gravy thicken. Garnish with parsley.
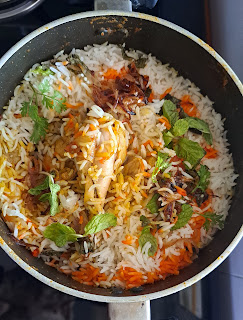
10. Serve this with buttered pav or herbed rice.

Chicken in apple sauce


Note

Add more chillies if you want more spice.
Any kind of apples can be used in this dish
You can use onions instead of cashews to make it less in calorie count.
Using boneless chicken  cooks the dish faster.

What a perfect Christmas dinner for two this was.


Monday 9 December 2019

Instant Maharashtrian Thalipeeth Recipe


Thalipeeth is a savory flatbread, a very common Maharashtrian dish. It is part of the Marathi cuisine for a long time. It is generally served at breakfast and also eaten as a snack. The dough is prepared from a flour called bhajanee. Several flours are mixed together with greens and other spices. Slow roasted in ghee or butter and served with ghee, butter, curd, chutney or mango pickle.

 Instant Maharashtrian Thalipeeth Recipe

Did you know?🤔Thalipeeth is an age-old Maharashtrian traditional recipe that is extremely healthy, nutritious and filling. Women back then made Thalipeeth when she had small qualities of various flours. It is also commonly called Pitla. I was first introduced to Thalipeeth by my Maharashtrian maid in Childhood. One is never enough, you always crave for a second piping hot Pitla on your Thaat(plate)

Ingredients

1 cup Fenugreek Leaves(Methi)/
Or
Palak leaves
1 Finely Chopped onion
2 Green Chillies
1/2 cup whole wheat flour
1/2 cup Jowar Flour (Sorghum)
1/2 cup Ragi Flour (Finger Millet)
1/2 cup Gram flour (besan)
1 teaspoon Red chilli powder
1/2 teaspoon Turmeric powder
1/4 tsp cumin powder
1/2 tsp coriander powder
1/2 cup yogurt
1/4 tsp asafoetida (hing)
Salt to taste
Oil / ghee for smearing


Instant Maharashtrian Thalipeeth Recipe

Method


1)Wash and roughly chop up the fenugreek leaves and keep this aside in a bowl.
2)Take a  mixing bowl, add the whole wheat flour, jowar flour, ragi flour, besan, turmeric, red chili powder, coriander powder, cumin powder, salt and mix well with a spoon.
3)Now add in the chopped fenugreek, green chili and onions.
4)Now make a firm Thalipeeth dough using curd and lukewarm water. By adding water slowly bit by bit, you can assure that all the ingredients are mixed well together.
5) Divide the dough into equal parts, press each ball down on a wet surface to make a round roti with your fingers. Let it not be too thin. If you wish you can cut it into a perfect circle with the help of a round plate. Make small slits or cuts in Thalipeeth so it cools evenly.
6)Now preheat the pan or skillet on medium heat.
7)Transfer the patted thalipeeth on the preheated skillet carefully so that it doesn't break.
8) Pour a teaspoon of oil or butter around and let the Thalipeeth cook on the base for about 4 minutes.
9)Flip over the thalipeeth and cook on the other side. Cook on slow so that it cooks evenly and crisps on the outside.
10) Prepare the rest of the Thalipeeths in the same way.
11) Serve it piping hot with the accompaniment of your choice.

Instant Maharashtrian Thalipeeth Recipe

Note


1. You can use grated cucumber or bottle gourd instead of methi or palak leaves.
2. Grate a small amount of ginger during winter months for that added heat and deliciousness. 

morya foods

Want a Change?
Welcome, Morya foods. It's an instant mix of your favorite Thalipeeth. Four delicious prepared Thalipeeth in one packet. You need to keep it frozen and heat and eat. Authentic flavors and very easy to prepare
Morya foods are available on big basket and you can also check Moryafoods for their range of products.

Saturday 23 November 2019

Benefits of eating figs and two fresh fig recipes


Figs are a fleshy fruit with multiple seeds and very delicate skin. It is a member of the Mulberry family. Figs are sweetish and pulpy to taste that is why it can be crushed to make juices and smoothies. Figs are also dried preserved and eaten like candy. This is because of its high sugar content.  In India, figs are called anjeer and are also considered as a superfood. 


Benefits of eating figs


Let us first learn more about this superfood and then learn two easy recipes to enjoy it better 


The benefit of Fresh Figs


1. A fig is a good source of dietary fiber that will make you feel satiated. So, besides being a great option for healthy eating options, it will make you lose weight too.

2. Also known for its beauty-enhancing properties skin, figs can make you glow like a glowworm. Mash two ripened figs and apply the mix on your face for 15 minutes. It also helps to reduce blemishes and acne.
3. Figs are high in alkaline content, so it can control acid levels in the body. Scientific studies show that figs lower triglyceride levels too. 
4. High in the potassium content, figs help regulate blood pressure and hypertension.
5. Dried figs have high levels of phenol antioxidants, which aid and fight against the damage caused by free radicals.  The calcium in figs makes bones stronger.
6. People suffering from iron deficiency must have figs daily. It is an excellent source of antioxidants that help build g red blood cells, which carry oxygen throughout the body.


I love chomping on figs; however, this time I made two interesting recipes with them. One was a low cal healthy dessert and the second was my post-workout energy smoothie. Note the ingredients and recipes below. 


Honey Fried Figs with Walnuts

Honey Fried Figs with Walnuts

 Ingredients


4 ripe figs
1 tsp butter
1 tbsp honey
handful of walnuts
dash of wine


Method


1. Slice the figs with the skin.


2. Add butter in the pan, let it melt and then switch off-gas. Add the walnuts and honey and wine and stir till walnuts get coated with honey.


3. In the same pan, place the sliced figs and place over a slow flame for 30 seconds, turn and cook again for 30 seconds. Over cooking them makes it mushy.

4. Now in a dish, place the figs, top it with walnuts and drizzle a little more honey over it. 


5. Cool it in the refrigerator before serving.

6. You can add some cream cheese over the fig as an option too.

Makes a delicious appetizer/dessert. 


Fig Almond Smoothie


Fig Almond Smoothie

Ingredients


2 figs
1 cup milk/ curd
1 tbsp honey
A sprinkle of cinnamon
3 almonds
1 scoop protein powder (optional)


Method

1. Grind the almond, figs and protein powder together. 


2. Add the milk and honey and blend all the ingredients together.

3. Chill and serve.

4. You can add dates instead of honey. Even combine a banana with figs, it tastes delicious.


Saturday 16 November 2019

KITCHEN TIPS FOR EVERY WOMAN!!


How often do we face problems in the kitchen? 
Cooking for the first time? 
Trying out a new recipe? 
Or just not familiar with a recipe? 
In that case, do you refer to Google, use your intuition or call your mother up for advice. 
Well, I have listed out some really helpful Kitchen tips for every woman.  

KITCHEN TIPS FOR EVERY WOMAN


 KITCHEN TIPS FOR EVERY WOMAN!!


1. If ever you happen to over-salt a pot of soup, just drop in a piece of potato. The potato will absorb the extra salt.

2. When you boil eggs in a pan, add a spot of salt to keep the shells from splitting and breaking.

3. Never put citrus fruits(Oranges, Lemons, limes, and so forth) or tomatoes in the refrigerator. The low temperatures corrupt the smell and kind of these fruits. (That's the reason our tomatoes don't last in the ice chest)

4. To clean an iron tawa, don't utilize cleansers. Simply scour them with salt and a spotless, dry paper towel.

5.  Keep curry leaves fresher and for a longer time by keeping them with fenugreek seeds in an airtight box. If you land up with excess curry leaves, remove from the stem, pop them in a microwave oven for 1 minute. They will dry up. Later grind them in a mixer to make curry powder to use later.

6. In the event that you are making gravy and it gets burnt at the bottom. Do not panic, transfer the rest to a new dish. Include a little sugar and keep stirring. The sugar will absorb the burnt flavors and the gravy tastes good too.


7. For quick dinner ideas, soak beans like rajma and chole and strain to refrigerate it.  Later use it for a quick salad or gravy to save time.

8. To check the age of eggs, place them in a bowl of water. Eggs that stay on the base are new. In the event that just one comes up, the egg is less new and ought to be utilized soon. In the event that it floats immediately, it could be spoilt.

9. To get rid of ants from the kitchen, discover where they are coming in and spread the gap with oil jelly(Vaseline). Ants won't trek through the jam. In the event that they are going under an entryway, draw a line on the floor with chalk. The little bugs moreover won't cross a line of chalk.


10. Try not to store your bananas in a bunch. Separate your bananas and place each in an alternate area. Bananas discharge gases which cause natural products (counting different bananas) to age rapidly. Isolating them will keep them crisp longer.

11. To keep potatoes from sprouting, put an apple in with them. This is proven with experimenting, that potatoes last longer.

12. Store green chilies wrapped in a tissue paper to make it last longer.

13. After boiling pasta or potatoes, strain the water and keep aside.  Cool the water, what's more, use it to water your home plants. The water contains supplements that will make your plants bloom

14. While defrosting meat from the cooler, pour some vinegar over it. In addition to the fact that it tenderizes the meat; it will likewise cut down the solidifying temperature of the meat and cause it to defrost speedier. Note,  every lady ought to have vinegar in her kitchen.

15. Do you cry while stripping off onions, at that point attempt this? In the wake of stripping off your onions, refrigerate the onions for at least 5minutes, at that point dice it. You will be happy you did.

16. For aluminum dishes that are looking dull, just heat up some apple strips in them. This will light up up the aluminum and make your home smell yummy.


17. When your salt gathers moisture and looks lumpy, put a couple grains of rice in with it to absorb the extra dampness.

18.  keep an aloe vera plant by your kitchen window. It's significant when you accidentally cut your hand. Simply scrape the leaf and rub the gel from where you have got hurt.

19. When making a soup, sauce, that is extra oily or greasy on the top, just drop an ice cube. The ice will draw in the fat, which you would then be able to scoop out. This does something amazing

20. If you wish to reuse cooking oil for frying but want to remove the previous taste it has developed,  cook a 1/4″ bit of ginger in the oil. It will expel any remaining flavors and smells.

 21.When tomatoes are cheap, purree them and store in it ice cubes. Later take a few frozen pieces as and when required for cooking.

Kitchen tips for every woman


22. Skip recipes that have onions as a base, onions are frightfully expensive plus take a long time to cook in a recipe. Stir fry veggies or sprout salads with don't require onions is a good option for a 20-minute prep and serve the meal.


23. And my last tip to all my fellow Indian multi-tasking ladies is to use the pressure cooker to your advantage. It cooks faster, uses less gas and retains food flavors. A real asset in the kitchen. Invest in a really good quality brand. 

Saturday 26 October 2019

Caramelized Rice Kheer - Rice Payasam


Decided to do something different from the regular this time. Plain rice kheer was too simple and plain, so made a caramelized Rice kheer this Diwali. This delicious and quick kheer is easy and you can stir it under 30 minutes. It has a delightful caramel flavor and I promise you cannot stop at one spoonful.

Caramelized Rice kheer


Note the simple ingredients easily found in the kitchen,  stir it up for your family and guests this Diwali. This Rice Payasam cn be savoured hot or cold. You can make it with cooked rice to ease out the procedure. Sweetannu believes in easy methods to simplify cooking and save time in the kitchen.

Fruitss and nuts add flavour to kheer


Ingredients


1 liter  Milk
2 Cups Cooked Basmati Rice
5 tbsp Sugar
1/4 tsp  cardamom powder
1 tsp  chopped cashew nuts
1 tsp almonds
1 tbsp Raisins and fruit peels


Caramelized Rice Kheer - Rice Payasam

Method


1.  Wash the rice and cook thoroughly strain and keep aside for using during kheer preparation.

2. Heat a heavy-bottomed pan. Once it is hot, add half the sugar. Let it melt and caramelize until golden brown in color. Keep stirring so it doesn't burn or brown.

3. Add the milk and sugar slowly to this. See that it doesn't splatter. Mix well and let it boil.

4. Mash the cooked rice with a back of a spoon. Now add this to the boiling milk.

5. Add the rest of the sugar and cardamom powder. Cook until the rice blends and cools over medium heat. Stir periodically.

6. Keep stirring on slow flame until the rice is cooked well and the caramelized kheer is slightly thick.

7. Mix half of the nuts and raisins while cooking. Now remove from fire.

8. Garnish with the rest of nuts and now your Caramelized Kheer is ready to be served.

9. You can serve it warm or chilled. Both ways it's very enjoyable and perfect for the festive season of Diwali.


Check out the recipe for Healthy Butter Cookies


Thursday 17 October 2019

Recipe of Leftover Rice Cutlets


What do you do with leftover rice? Our large hearts and good feeding intentions sometimes get us to cook a larger portion of rice leading to leftovers.
This time I decided to put together a healthy snack recipe of Rice cutlets for an evening snack.
Here the cooked rice will be mixed with veggies and spices and is pan-fried. The rice cutlets come out well done on the outside and soft inside. Delicious and have to be served nice and hot. 


Leftover Rice Cutlets

Here is how to do leftover rice cutlets. This recipe will make 12 to 15 palm-size cutlets. The preparation and cooking time of this dish is not more than 30 minutes, so it can be made just half-hour prior to tea time.


Ingredients 


 2 cups of leftover cooked rice
1 finely chopped onion
1/2 cup grated carrot
1/2 grated beetroot
1 boiled and mashed potato
1 chopped green chilly
2 tbsp gram flour
2 tbsp chopped coriander leaves
1/2 tsp red chilly powder
Pinch of sugar
1tsp lime juice
Salt to taste
Oil for shallow frying


Method 


1. Take a mixing bowl and add the two cups of cooked rice. Mash lightly with the back of a spoon.
2. Add in finely chopped onions, chopped green chilies, coriander leaves, mashed potato, grated carrot, and beetroot. Give it a stir.
3. Add the salt, sugar, lime juice, dry spices and gram flour. Now knead with your hands to make a dough.
4. The dough should not be sticky.  Check it by rolling on your palm to make a ball. If it sticks you can add a little more gram flour.
5. Now divide the dough into small round balls and flatten with your palm.


6.  Make oval shape cutlets, this is something different than the regular round Tikki shaped ones.
7. Take a non-stick frying pan, add a little oil to cover the bottom. When the pan is hot add the cutlets and brown them on one side.

Leftover Rice Cutlets

8. Now flip them over and cook on the other side. This can be done on the slow flame so that the cutlets cook through.
9. Remove them on a dish. Now serve it with a vegetable salad and tomato ketchup at tea time.


Leftover Rice Cutlets

Note

You can avoid the beetroot and add grated cabbage instead.

If you not having gram flour at home, substitute it with rice flour or bread as a binding agent.

Another variation for this recipe would be making ladoo shaped balls of the dough and dipping it in egg batter to deep fry them. This can be savored at mealtime.
The best part of this recipe is the experience of savoring it. It is so yummy that no one can tell it's made from leftover rice.


If you have a unique leftover rice recipe, I would love to hear from you on anahitairani200@gmail.com. And can invite you to do a guest post on my Blog.

Till then, keep it simple yet yummy for your family. 🍳🥘🍲🥣🥗


You can also check recipes for - Veg Shammi Kebabs 
                                                  - Spicy Mince Kebabs
 

Tuesday 8 October 2019

Butter Garlic Crab Recipe


I have never cooked up a crab recipe on my blog before. In the past I have made crab curry with coconut and masalas. Today I decided to share the easy butter garlic crab recipe that I stirred up a few days back.
After the month of Shravan, the fish is in abundance in local markets and so are the crabs. Beautiful big crabs that have sufficient meaty substance in it and combined with spices give a delicious taste to the palate. 4 to 5 big crabs is all you need to make this dish.

Butter garlic crab recipe

First and foremost crabs need to be cleaned well. You can ask your Fisher lady to do it for you.


Ingredients 

4-5 big crabs
1 onion
1 sprig of curry leaves
6-8 chopped garlic
1 chopped green chillies
1 piece chopped ginger
2 tbsp butter
I tsp crushed pepper
Salt to taste 


Method

1.Clean the crabs well in running water and crack the pincers.

2. Boil enough water that will soak the crabs. Add curry leaves, chopped ginger and salt in that heavy bottom vessel. Now boil for 8 to 10 minutes till crabs turn white.

3. Switch off the gas remove only tye crabs and discard the rest.

4. Heat butter to the pan, add the  finely chopped onion and saute till pinkish.

5. Also add the chopped garlic, chopped green chillies and saute for 2 minutes.
6. Now add the boiled crabs and mix it in gently.

7. Add half cup water, cover the pan with a lid and let it simmer on slow flame for another 5 minutes.

Butter garlic crab recipe


8. After opening the lid, you will see that the crabs have turned slightly pinkish red in colour.

9. Add salt to taste n crushed pepper.
Cook till the crabs are dry, add a dollop of butter if you wish.


10. Garnish with finely chopped spring onions or parsley. Enjoy this finger licking dish with all your fingers and all your senses.


Thursday 26 September 2019

The Unbelievable Benefits of Drumsticks


It’s a beautiful feeling as I reminisce the drumstick tree (Moringa Oleifera Tree) we had in the backyard of my grandmother’s village home. Drumsticks grew in abundance and we cooked it in various form all through the month. We even sent out neighbors and relatives a bundle of Drumsticks.
You will be happy to discover the Drumstick vegetable (thin, long green seed units) being cooked in almost every Indian home. Elderly people in India swear by the taste and medical benefits of the drumstick. The drumstick tree is common to India and also found in the continent of Africa. While Drumsticks have been proclaimed as one the later superfoods, the truth of the matter is that this vegetable has been utilized in Indian cooking, particularly in South Indian dishes for a considerable length of time.


The Unbelievable Benefits of Drumsticks

Drumstick may be boring in taste for most of us, however, it offers plenty of medical advantages.


The Benefits of consuming Drumsticks

1. Controls glucose levels

Drumsticks are known to benefit diabetics as they are known to decrease the high glucose levels fundamentally. It is additionally known to improve nerve bladder work, which thus is useful in bringing down blood glucose.

2. Aids stomach health

Drumsticks are a great source of B nutrients like niacin, riboflavin, and nutrient B12, which are famous to assume a primary job in improving your stomach health. B nutrients help to separate the nourishment and make it simpler to process them easily. Besides, drumsticks contain dietary fiber that additionally helps the stomach related procedure.

3.  Health for bones
My grandmother told me to chew the drumstick skin as it is good for bones. This is amongst the most significant medical advantages of drumsticks is that it advances a sound bone structure because of the nearness of high measure of calcium and iron that help construct solid bones, yet in addition avoids the loss of bone thickness, further expanding by and large stamina and wellbeing.


 4. Improves blood purification
Drumsticks are acknowledged to have blood sifting properties and further goes about as an extreme enemy of contamination administrator. Consuming drumsticks all the time may empower you to streamline blood course well. The leaves and seeds of drumsticks help in cleaning blood just as go about as a strong serum poison pro. Use of this green vegetable all the time lessens the chance for skin irritation and other skin related issues.


 5. Helps respiratory issues
 Drumsticks have high calming elements and a good quantity of Vitamin C which aids breathing. It controls the development of hypersensitivities in the respiratory tract because of allergens and keeps them from forming into diseases and clog.

 6. Drumsticks is an immunity booster
 The main nutrient Vitamin C helps fight off different allergies, boosting by and large insusceptibility arrangement of the body. They counter attack bacteria that attacks the body and helps in building its immunity.

7. Helps during Pregnancy
Pregnant ladies are frequently prescribed to incorporate drumsticks in their eating routine as they help during delivery time. Drumsticks can adequately ease pre and post-delivery complications. The high substance of nutrients and minerals in this vegetable assumes a significant job in lessening drowsiness of the uterus and lifts creation of milk post conveyance.

8. Enhances Sex quality
The occurrence of a decent measure of zinc in drumsticks upgrades the procedure of spermatogenesis – advancement of the male regenerative cell. The bark of the plant contains certain exacerbates that help in restoring impotency, untimely discharge and slimness of semen.

The bottom line
Don’t go by the taste, Drumsticks have proven to be utmost healthy and full of nutrition. With loads of quantity in calcium, iron and other vitamins, drumsticks have varied all-round health benefits to aid all kinds of ailments. This is why you must add drumsticks in your diet.


 You can also check out - How to choose the best cooking oil

Thursday 5 September 2019

Chilli Potato Chinese Recipe


Chinese Chilli Potato??
Is it a dish??
Yes, Indeed!!

Potato Chinese is a Chinese recipe which is prepared with potatoes, Chinese sauces, salt, and red chilies. This dish can be prepared if you are really bored with cooking the same yellow potato bhaji. Its sweet and spicy is very likable. Simple to cook, stunning to look and very enjoyable.

One can enjoy this vegetarian delicacy as snack or starter on occasions like Friday nights, kitty parties, packed lunches, children's tiffin, and relished during the monsoon season. Add a dash of.ketchup to this dish and garnish it with spring onions.

Chilli potato chinese recipe

Ingredients


1/2 kg boiled potatoes/ 4 large potatoes
3 tbsp cooking oil
2 - 3 chopped spring onions
1 tsp soy sauce
1 tbsp Shezwan sauce
1 tbsp tomato ketchup
1 tbsp chopped garlic
Salt to taste
Spring onion greens for garnish


Method


1. Boil the potatoes in a  pressure cooker. Pour enough water in it and cook for 2 -3 whistles. Let it cool, peel and cut potatoes into cubes.

2. Now place a frying pan over medium flame and heat oil in it. Once the oil is heated, shallow fry the boiled potatoes until golden brown in color. Switch off the gas and take the fried potatoes out.

3. In the same pan, add chopped onion garlic, all the sauces and fry for one minute.

4. Now add the potatoes and stir well with a light hand. Add salt and mix it well. Keep stirring on a slow flame for another one minute.


5. Garnish it with spring onion greens and serve it piping hot. Relish Chinese Potatoes and enjoy with friends and family.

Note-


You can use cornflour and deep fry the potatoes too.
Try the same recipe with sweet potatoes.
Add capsicums to this dish for variation
This dry potato filling can be stuffed in samosas too.

Sunday 1 September 2019

Mexican Chicken in Red Sauce Recipe - Pollo Rojo Chicken

Mexican Chicken in Red Sauce Recipe


The Wild Asparagus Table is an interesting concept brought together by Ms. Saloni Malkani - Founder member of the FBAI and Chef Ananya Banerjee. Once a month they introduce an International Cuisine, bringing home chefs/ food enthusiasts, together with a potluck lunch or dinner.

sweetannu

Each lady researches and stir up a dish to present on the day planned. It can be a starter, main course or dessert.
It was the fastest finger win, to be a part of the second #WildAsparagusTable. And the theme for the month of August was Mexican Cuisine.
Mexican food has Spanish, European and traces of African and Asian influences. Their food is full of robust flavors, spicy and is generally slow-cooked all together. The primary ingredients in the cuisine are corn, beans, garlic, avocado, cacao, locally grown vegetables, all kinds of meats and of course - Chillies. What's your favorite Mexican food?


Mexican Chicken in Red Sauce Recipe

On my quest to cook easy yet delicious dishes, I decided to try a Mexican Chicken in Red Sauce Recipe -  Pollo Rojo Chicken dish.  It has 6 basic ingredients and this rich saucy chicken dish is eaten with steamed rice. My dish turned out well, I could tell by the empty pot at the end of the potluck lunch, that it was well appreciated by all. I feel simple, less complicated flavors makes a dish more enjoyable.

Now note down the ingredients and method to make Pollo Rojo Chicken.

Ingredients

Half kg boneless chicken breasts
1 large white onion
5 large tomatoes
6 -7 garlic pods
2 cups chicken stock (broth)
6 - 8 Mexican chilies
Salt to taste

Method

1. Deseed the chilies and soak then in warm water for ten minutes.
2. Add a little oil in the pan and brown the chicken breasts on both sides.
3. Now remove the chicken and cut them in long strips. Keep aside to use later.
4. In the same pan, add onion and tomato halves. Broil until the tomato skins become very wrinkled and shriveled. Let the onions get translucent.
5. Take a blender, add the onions, tomato, garlic, and soaked chilies to make a paste. You can add chicken stock to get a fine puree.
6. In a pan, add the remaining oil and the tomato chili paste, chicken pieces, chicken stock, and salt to taste.
7. Cook till the gravy thickens. You can season with oregano if need be and garnish with greens of spring onion.
8. Enjoy Pollo Rojo chicken with Tortilla chips or steamed rice.

Pollo Rojo chicken


Note


Mexican chilies may not available, use the lesser spicier version of Kashmiri red chilies.
If your dish gets too spicy, add a heaped tablespoon of tomato ketchup to lessen the spice and sweeten the dish.
You can use Maggi chicken stock cubes instead of chicken broth.
If white onions are not available use large spring onion heads or the regular red onions available.


Some delicious nonvegetarian dishes of our fun Mexican Potluck Table.


Mexican Potluck


Easy One pot Chicken Biryani

  Easy One pot Chicken Biryani  No fuss steps infact a one pot preparation with a flavourful outcome!  "Fall in love with the irresisti...