Showing posts with label easy recipe. Show all posts

Sunday, 16 January 2022

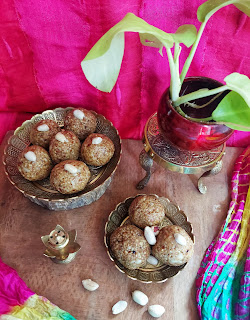
Winter Special Sesame and Peanut laddoo

Winter Special Sesame and Peanut laddoo

 The yummy little balls of crushed peanuts and Jaggery, infused with the richness of Ghee and the heavenly taste of spiced ginger. 

Just pop one in your mouth when you’re feeling the need for some warmth and sugar, and smile as you go about savoring this delicious Winter Low Cal Laddoo. 


Winter Special Sesame and Peanut laddoo  The yummy little balls of crushed


Ingredients 

•1 cup  crushed Peanut

•1 cup Sesame Seeds

•1 cup Jaggery 

•1 tbsp Ghee

•1 tsp Ginger Powder 


Instructions


1. First roast the crushed peanuts  in a pan for few minutes.  Make sure that it's on low heat, then set aside and let it cool.


2. In the same pan add the sesame seeds and roast until they start to pop. 


3. After it cools Down, powder the sesame seeds coarsely and transfer to the mixing bowl.


4. Coarsely crush the peanuts too and add this to the sesame seed mixture.  


5. Now add ginger powder,  jaggery and ghee. 


6. Mix well and now shape into laddoos. 


7. The laddoos can be stored in an air tight jar upto 15 days.  


Note


You can also add black sesame seeds to this laddoo of you wish. 

I have used less ghee in this recipe. If needed add according to your requirements it gets easier to bind together. 


Friday, 23 July 2021

Easy Pear salad with Feta Cheese and walnuts

 Easy Pear salad with Feta Cheese and walnuts 


So the saying goes : When life gives you lemons, you should make lemonade.
I improvised on that saying ..... 

So when life gives you pears, you should make a delicious Pear Salad. 

When I recently visited the Bandra Bazar I noticed an abundance of pears being sold at every street vendor's stall. I got really excited to pick up a bagful of fresh soft juicy pears at a really good price. On  returning home, I wished to make the best recipe with them hence I tried this Pear and Feta Cheese Salad. The secret ingredient that makes it extremely palatable and delicious is Mustard. 

It was light refreshing and extremely delicious. The fresh pears, salad leaves when combined with soft Feta cheese made a  great combination to relish.  

Note the ingredients for the easy Pear  Salad with Feta Cheese and walnuts..


Ingredients 


For the Salad 


1 Bunch lettuce or rocket salad leaves 
2 Sweet & crunchy pears
1 cup crumbled Feta Cheese
 Handful mixed nuts ( walnuts, almonds, Cashew Nuts) 
Pomegranate seeds/Corrinader for garnish (optional) 


For the Dressing


2 tsp honey 
1 tbsp mustard 
1tsp Balsamic vinegar 
1 tsp  Extra virgin olive oil
Salt & pepper to taste 
Juice of half lemon

Method 


1. Roughly chop the lettuce leaves. Also chop the pears into small cubes.

2. Now make the marinade dressing with ingredients and keep aside.

3. Take a large bowl, add the Pear, nuts, lettuce leaves and mix it together lightly.  

4. Add salt, pepper and a dash of lime juice to this. 

5. Keep it in the refrigerator. Just before serving mix in the marinade.

6. Now add the crumbled Feta cheese and toss it lightly. 

7. Garnish With Pomegranate seeds and Corrinader leaves. Serve the salad chilled and fresh.


Trust me it's a refreshing change to your regular salad. You can add cubes of cottage cheese if feta cheese is not available. 
Hope you liked my easy Recipe. If you have any other interesting salad recipe do share it in the comments below. 

Friday, 15 January 2021

Chinese Style Soupy Rice Bowl

Chinese Style Soupy Rice Bowl 

Bored of making the same Chinese fried rice with Manchurian gravy at home? Well, you just need to be a tad bit creative like me. So this is what I tried instead of that. I cooked up one pot Chinese style soupy style pot rice. It was spicy with Asian flavors, goodness of veggies and added egg for protein. You can add chicken instead or even paneer if you prefer to be vegetarian.

The Sauces mixture is made with just soy sauce, Oyster Sauce, shezwan sauce, lime juice and pepper. You can add the sauces you have in your refrigerator. This makes a  perfect winter dish, it was soupy, saucy, tangy and so much more.


HOW I MAKE CHINESE STYLE SOUPY RICE

To get this simple recipe right you have to remember a few things.

A) SEPARATELY COOK THE RICE- Par cook the rice and then cook together when needed in recipe

B) SEPARATE VEGETABLES FROM LEAFY GREENS- In this recipe you can add any type’s of veggies available in the house. You need to cook veggies like carrots, beans, capsicum/bell peppers, broccoli, cauliflower and corn a little more than cabbage and green leaves. The purpose of this so we can add the stems to cook with the rice, then just wilt the leafy part using residual heat while the rice is resting.


Ingredients

2 tbsp oil

2 garlic cloves, minced

1 piece grated ginger

1 finely chopped onion

1 ½ cup assorted chopped vegetables( carrot, bell peppers, baby corn, zucchini,  broccoli)

1 ½ cup Rice

1 Maggi seasoning powder packet

1 cup chicken/vegetable stock

2 chopped green chillies

2 eggs

Salt and pepper to taste

Spring onion greens for garnish


Sauces
2 tbsp soya sauce

1 tsp oyster sauce

1 tsp Shezwan sauce

1 tsp lime juice 


Method

1. Mix all the sauces together,to make a marinade and keep aside  

2. Wash, clean and cut all the vegetables into small cubes or long pieces. 

3. Beat two eggs, add salt and make an omelet. Once cool cut the omelet into small strips and keep aside.

4. Par cook the rice in water and add maggi seasoning powder to this. 

5.  Now heat 1 tbsp oil in a pot/kadai. Let the oil heat,  add onion, garlic, ginger and cook for two minutes. 

6. Add the vegetables, sauté the vegetables for two minutes on high flame.

7. Add the Chinese sauce marinade  and a cup of stock. Bring to a boil.

8. Now add the par cooked rice and mix well. Cook till the liquid is absorbed and rice is cooked.

9. Add the omelet to this. See that the dish is not too dry. If it is dry add stock to make it soupy.

10. Add the spring onion greens, and salt to taste. Now serve this Chinese style soupy Rice bowl with pride but serve it piping hot. 


NOTES

You can make it an all Veg Pot Rice. Add cubes of Tofu or cottage cheese instead.

Also add other Asian Greens - like pak choy, bok choi etc. Cut per recipe but scatter across top rice when its cooked.
 

Saturday, 26 December 2020

Easy Recipe of Beetroot Pachadi

 Easy Recipe of Beetroot Pachadi


Beetroot pachadi is a chutney style dish of beetroot which is integral part of Onam Sadhya.


Bring in your Onam festivities with this mildly spiced, curd-based Beetroot Pachadi. This dish is a must on during every offering.  Its deep red color and unique taste  makes it extremely likeable in every morsel. Read the full recipe here:


Beetroot Pachadi


Ingredients:

2 large beetroots

1/2 cup water

½ tsp cumin / jeera

1 whole chilli

½ cup curd

1 tsp salt

½ cup grated coconut

¾ tsp mustard


FOR TEMPERING:

½ tbsp mustard oil

Fresh curry leaves

1 teaspoon mustard seeds

3 dried red chilli

Beetroot Pachadi


Method


1. Grate  both the beetroots and boil it in hot water. In the same utensil, add ½ salt and mix it well. Cover it using a lid and let it boil for 15 minutes till beetroot are cooked. 

2. Now take the 1/2  cup coconut, 3/4  tsp mustard,1/2 tsp cumin, 1 chilli combine all this. Blend it to a smooth paste in a mixer grinder. Keep adding water bit by bit to maintain the consistency of the paste.

3. Mix the paste with the grated beetroot and let them rest for a while.

4. Now cook this over a sim flame for 7-8 minutes to get the taste of raw coconut out. 

5. Let it cool down a bit and add 1/2 cup curd to the mixture and mix it well. 

6. Ensure that the curd doesn’t form lumps and the batter has smooth consistency overall.


FOR TEMPERING 


7. Heat ½ tbsp mustard oil in a pan and splutter 1 tsp mustard seeds, curry leaves and  dried red chillies.

8. Now pour the tempering over pachadi and let it settle at the top.

9. Now serve the beetroot pachadi piping hot with banana chips and steamed rice.


This Recipe was shared by my sister's Mother in law Ms  Arundhaty Vijayan. She makes some really amazing recipes in her earthen pots especially this Beetroot Pachadi and serves it with pride along with prawn curry and rice. 

Monday, 11 May 2020

Easy Punjabi Chole Recipe

Cooking without any house help for over a month now.  The other day I was craving restaurant-style chole like crazy. So I went through my school days recipe book to realize it's not so difficult at all. While I soaked up the chickpeas one night in advance, I also searched my kitchen pantry for the ingredients and yes, I did have most of them.


Easy Punjabi Chole Recipe


So here is my modified lockdown Easy Punjabi Chole Recipe.

Ingredients


2 tbsp cooking oil
2 cups of chickpeas (before soaking)
2 finely chopped or grated onions
5 pureed tomatoes
1 teabag
3-4 cloves
1 tbsp ginger-garlic paste
2 tbsp Chole Masala powder
1 tsp cumin powder
 3/4 teaspoon red chili powder
1/2 tsp Turmeric powder
1/2 tsp garam masala
1/2 tsp anardana ( or Amchur powder)
1 tbsp ghee
1 tbsp ginger juliennes
Coriander for garnish
Salt to taste

Ant Chole Lovers in the house?


Method


1. The next day or after 12 hours of soaking you can add the chickpeas to a pressure cooker with a pinch of salt and the teabag.

2. Let it cook for 15 minutes in the cooker. Once cool, open the lid of the pressure cooker.

3. Discard the tea bag, but do not throw away the water.

4. In a Kadai heat 2 tbsp of oil. Once it is hot, add the cloves and grated onions. Fry the onions until they turn golden brown in color.

5. Now add the ginger-garlic paste and cook for 3-4 minutes till the smell of ginger-garlic diminishes.

6. Lower the flame and add the tomato puree, stir and let it cook for 12-15 minutes on medium-low flame.


7. Now add the chole masala, red chili powder, turmeric powder, cumin powder, salt and stir it well.

8. Add the chickpeas and add them to the tomato-onion mixture, stir till all the chickpeas are coated with spices, around 2 minutes.

9. You can add the water if the gravy thickens up while cooking.

10. Add the anardana powder and simmer for another 15 minutes.

12. Now in a separate small pan, add ghee and the ginger julienne to it. Fry till the juliennes are golden brown in color and add to the chole.

13. Now garnish with coriander leaves and serve it hot with bhatura,  puri or rice.

Easy Punjabi Chole Recipe


However, I served it up with fresh protein bread, salad, and some raita. It tasted equally delicious. And you can plus or minus masalas according to the availability in your kitchen. Don't forget two steps, add a teabag while cooking the chickpeas and the ginger in ghee step for that delicious Punjabi Chole Recipe.


Sunday, 26 April 2020

V - Easy Vermicelli Upma/Pulav

Hello Friends,

So we have reached the letter V in our BLOGCHATTER A2Z Challenge 2020.
I thought why not try to make a Vermicelli Upma/Pulav. I checked on Instagram for a really easy recipe that can be done under 30 minutes and I found this under the hashtag #Vermicelliupma.
This recipe belongs to @Chocolatetraffic. Do check out her recipe below. 


Ingredients:


1 cup Vermicelli/ Semiya
3 tbsp Finely Chopped Carrot
3 tbsp Finely Chopped Capsicum
3 tbsp Finely Chopped beans
3 tbsp Peas
2 tbsp Coriander
1 tbsp Lemon Juice
1 tsp Mustard
½ tsp Urad Dal
1 tsp Chana Dal
Few Curry leaves
2 tbsp Peanuts
1 inch Ginger
1 Red Chili
2 Green Chili
2 tbsp Onion
½ tsp Turmeric
Oil
Salt to taste
Water

Steps to cook Vermicelli:

1) In pan roast 1 Cup vermicelli in 2 tsp oil. Once it turns golden brown add boiled water into it.

2) Add ½ tsp salt and boil for 3-4 minutes. Drain off the water and allow cooling completely.

Steps to cook Upma:

1) In pan heat 4 tsp oil and add Mustard, Urad Dal, Chana Dal, red chili and curry leaves. Also add peanuts and roast on low flame.

2) After that add ginger, green chili.

3) Now add Onion and sauté well.

4) After 2-3 mins add all vegetable (peas, carrot, capsicum, beans) and sauté for 2-3 mintues.

5) Finally add turmeric and salt (as per taste) and cook till all vegetables turn soft.

6) Once vegetables are cooked well add cooked Vermicelli/Semiya and mix gently.

7) Add lemon juice and garnish with Coriander.

About Me:

Hey I am Yogita Patil. I love to Cook and Bake. I like to try new recipes and do experiment on different
dishes. Please follow me on Instagram @chocolatetraffic.


Monday, 13 April 2020

K- Khandvi Recipe

K- Khandvi Recipe #BlogchatterA2Z


 Have you tried making Khandvi at home? Well, I tried it over the weekend. I must say the mixing of ingredients you will get right however the process of rolling the Khandvi may get difficult to execute. I suggest you watch some YouTube videos too before trying out the recipe.


Khandvi

Khandvi is a melt in the mouth Gujarati Snack prepared with besan(gram flour) buttermilk, and other spices. Its an easy and light snack, unlike other fried besan snacks. Try to use fresh gram flour ( not stored one)  to prepare the khandvi.


Ingredients

1/2 cup Gram Flour (besan)
1 cup Sour Buttermilk
1/4 teaspoon Turmeric Powder
Salt to taste

For Seasoning


1 tsp Sesame Seeds (til)
1/2 tsp Mustard Seeds
1/2 tsp Cumin Seeds
1-2 Green Chillies,
10 Curry Leaves
2 tbsp grated Coconut
2 tbsp chopped Coriander Leaves
1/2 cup oil


 Method 


1. In a large mixing bowl, add the gram flour, buttermilk, turmeric powder, and salt.  Mix it well by hand and make a smooth batter.

2.  Grease the back of a thali or large plate and keep aside for rolling the khandvi.

3. Now pour the batter in a Kadai or heavy bottom pan. Keep it low flame and keep stirring.

4. Continue stirring to avoid lump formation. 

5. Keeping stirring and cook the batter until the mixture becomes thick and emits a cooked fragrance.  This will take 6 to 8 minutes

6. Now comes the tricky part. Take a ladle full of batter and place it in the center of the greased thali. 
  
7. Spread the batter, from the center to the sides to make a thin film and coat the entire thali. 

8. Let this come to room temperature.  Once cooled, take a sharp knife and cut into straight long stipes.  

9. Roll each strip from one end to the other with greased fingers. 

10. For the garnish,  heat 2 tbsp oil in a small vessel. Once the oil is heated add mustard seeds, cumin seeds, curry leaves, and green chilies and let it cook for 20-30 seconds.

11. Switch off the gas and add the sesame seeds at the end. 

12. Place all the Khandvi rolls in a dish. Now pour this seasoning over khandvi rolls.
 
13. Top it with shredded coconut and chopped coriander leaves. 

14. Serve it hot at tea time with mint coriander chutney or ketchup.


Saturday, 11 April 2020

J - Easy Jalebi Indian Dessert Recipe

 Hello Friends.
Today I write a sweet Recipe for the Letter J - Easy Jalebi Indian Dessert Recipe, #BlogChatterA2Z Challenge 2020.

I needed to fix my sweet cravings for Jalebis. So today I made a batch of those beautiful round juicy circles that a delightful to savor hot and cold. Jalebis are prepared on auspicious occasions or festivals. But I have discovered an easy recipe, in fact, an instant one. The batter can be even stored in the freezer to be used at a later stage when needed.


Easy Jalebi Indian Dessert Recipe,


Ingredients

1 cup Maida
4 tbsp powder of Urad Dal powder
2 tbsp Ghee
1 sachet Eno
1/2 juice of a lime
Water to make the batter
Cooking oil

For the sugar syrup

500 gms Sugar
Kesar / Saffron few strands
Kesar color few drops
250 ml of water


 Method 


 For the sugar syrup

1. Take a saucepan, add one cup of water, sugar, Kesar strands, and yellow color. Stir it on low flame and bring it to a boil.
 2. Keep stirring on low flame,  cook further for 2 minutes. The syrup should be thickened enough in   consistency. Let it cool and set aside for later. 
 
 For making the jalebi

 1. Take the Urad dal and grind it to a fine powder. Strain the dal and keep aside.

 2. Now in a mixing bowl combine maida, urad dal powder, Eno powder, lime juice and the ghee. Using your hand to gently kneed the mixture. Add a little water to make it a smooth paste.

3. Now add the mixture into a piping bag and snip the end to make a small hole for the mixture to come out.

 4. For frying the Jalebis, pipe the batter into small circular patterns, directly into the oil for frying. 

5. Heat the oil in a pan, and dip the jalebis in medium oil.

6. Fry on both sides till light brown in color. 

7.  After the jalebi is brown, remove the jalebi and dip them in the sugar syrup you have prepared earlier. 

8. Soak the Jalebis for a minute and then remove onto a serving plate.


Easy Jalebi Indian Dessert Recipe,


 Once all the jalebis are done,  garnish with some chopped pistachio and serve the yummy Jalebis hot.


Saturday, 4 April 2020

D- Easy Dalgona Coffee Recipe

Hello friends,

There is a new type of coffee, called Dalgona coffee that is trending on the internet especially Instagram. Instagrammers and foodies are whipping up this concoction and posting fantabulous images of this coffee to get praises and applauds from the world over. 


Easy Dalgona Coffee Recipe


In my quest to stir up easy recipes, I couldn't resist stirring up a Dalgona Coffee for the letter D for the #BlogchatterA2Z challenge 2020. 

 The Origin of Dalgona Coffee


1. Dalgona Coffee, a whipped coffee drink named after a Korean candy,.

2. This trend was first popular in South Korea and is widely spreading across the world.

3 As more and more countries have started recommending social distancing due to the spread of COVID-19, Dalgona coffee is the bonding food that unites people across the world.

4. It is a simple recipe and visually so appealing.

5. No better way to get your caffeine fix while quarantining and maintaining social distancing at home.

6. This frothy creamy mixture can be made hot or cold. 


 Dalgona coffee recipe ❤️

To make one cup of Dalgona Coffee

Ingredients

2 tsp of coffee granules
2 tsp of sugar
2 tsp of warm water
1 cup milk 


Method

1. Add  2 spoons of coffee powder and 2 spoons of sugar with 2 tsp of warm water in a bowl. 

2. Now mix it with a blender or whipper till it will become thick and changes color to light brown. 

3. The quantity will double up and will resemble whipped cream. 
Mix it well till the consistency becomes thick.

4.  Whip the coffee mixture until it is light brown, fluffy and holds stiff peaks when the whisk is removed.

5. Now add milk in a glass. and top it with the frothy Dalgona frothy cream. 

6. You can also add some cocoa powder at the top. 
 
7. Don't forget to grab a picture before you sip this excellent creation. 


Easy Dalgona Coffee Recipe


 Hope you liked my easy Dalgona Coffee Recipe?

Friday, 3 April 2020

Chocolate Sponge Cake or Choconut Cake

Hello Friends

It's time to make and bake a cake. But a very simple and easy chocolate sponge cake that can be done under 30 minutes. A perfect Quarantine teatime cake for the entire family. It's homemade and above all so simple to prepare. You can even get the children of the house to help in the mixing.


For this chocolate sponge cake, you will need the following ingredients.


Ingredients

3 eggs
1 cup of sugar
100 grams of butter
1 cup maida
1/2 tsp baking powder
1 teaspoon cocoa
Walnuts(optional)
1/2 cup milk
1/2 tsp vanilla essence
Cooking oil for greasing

Method


1. Crack the eggs in a bowl, to this add the sugar. Now beat the eggs and sugar till light and fluffy.
2. Now soft the self-raising flour(maida) baking powder and cocoa powder together.
3. Add this to the eggs and sugar mixture and stir well. You can do this by hand or using an electric beater.
4. Add vanilla essence and milk to this batter. Also ads the walnuts(optional)
5. Grease a baking tin with cooking oil and pour the cake mixture into the tin.
6. Preheat the oven at 180°C for 5 minutes.
7. Now bake for 15 to 20 minutes and see your cake rise in the oven.
8. This cake can also also be prepared in a microwave convection oven. Bake for ten minutes.
9. To check the cake poke a dry knife inside. If it comes out clean the cake is cooked properly. If not you need to cook it further.
10. Let it completely cool down before turning it over.
11. Now your chocolate sponge cake is ready to be served at teatime.
12. You can add some chocolate sauce on the top to make it more dense and indulgent.

Chocolate Sponge Cake


This was my post for Letter C for the #blogchatterA2Z Challenge

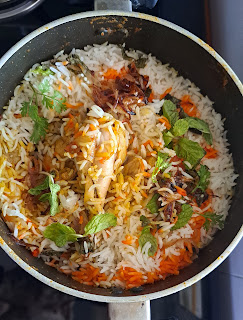
Easy One pot Chicken Biryani

  Easy One pot Chicken Biryani  No fuss steps infact a one pot preparation with a flavourful outcome!  "Fall in love with the irresisti...